Importing Icons from Fort Awesome
Customers of Fort Awesome can now migrate to Font Awesome Kits. In this guide we’ll show you how.
Getting the icons from Fort Awesome
Section titled “Getting the icons from Fort Awesome”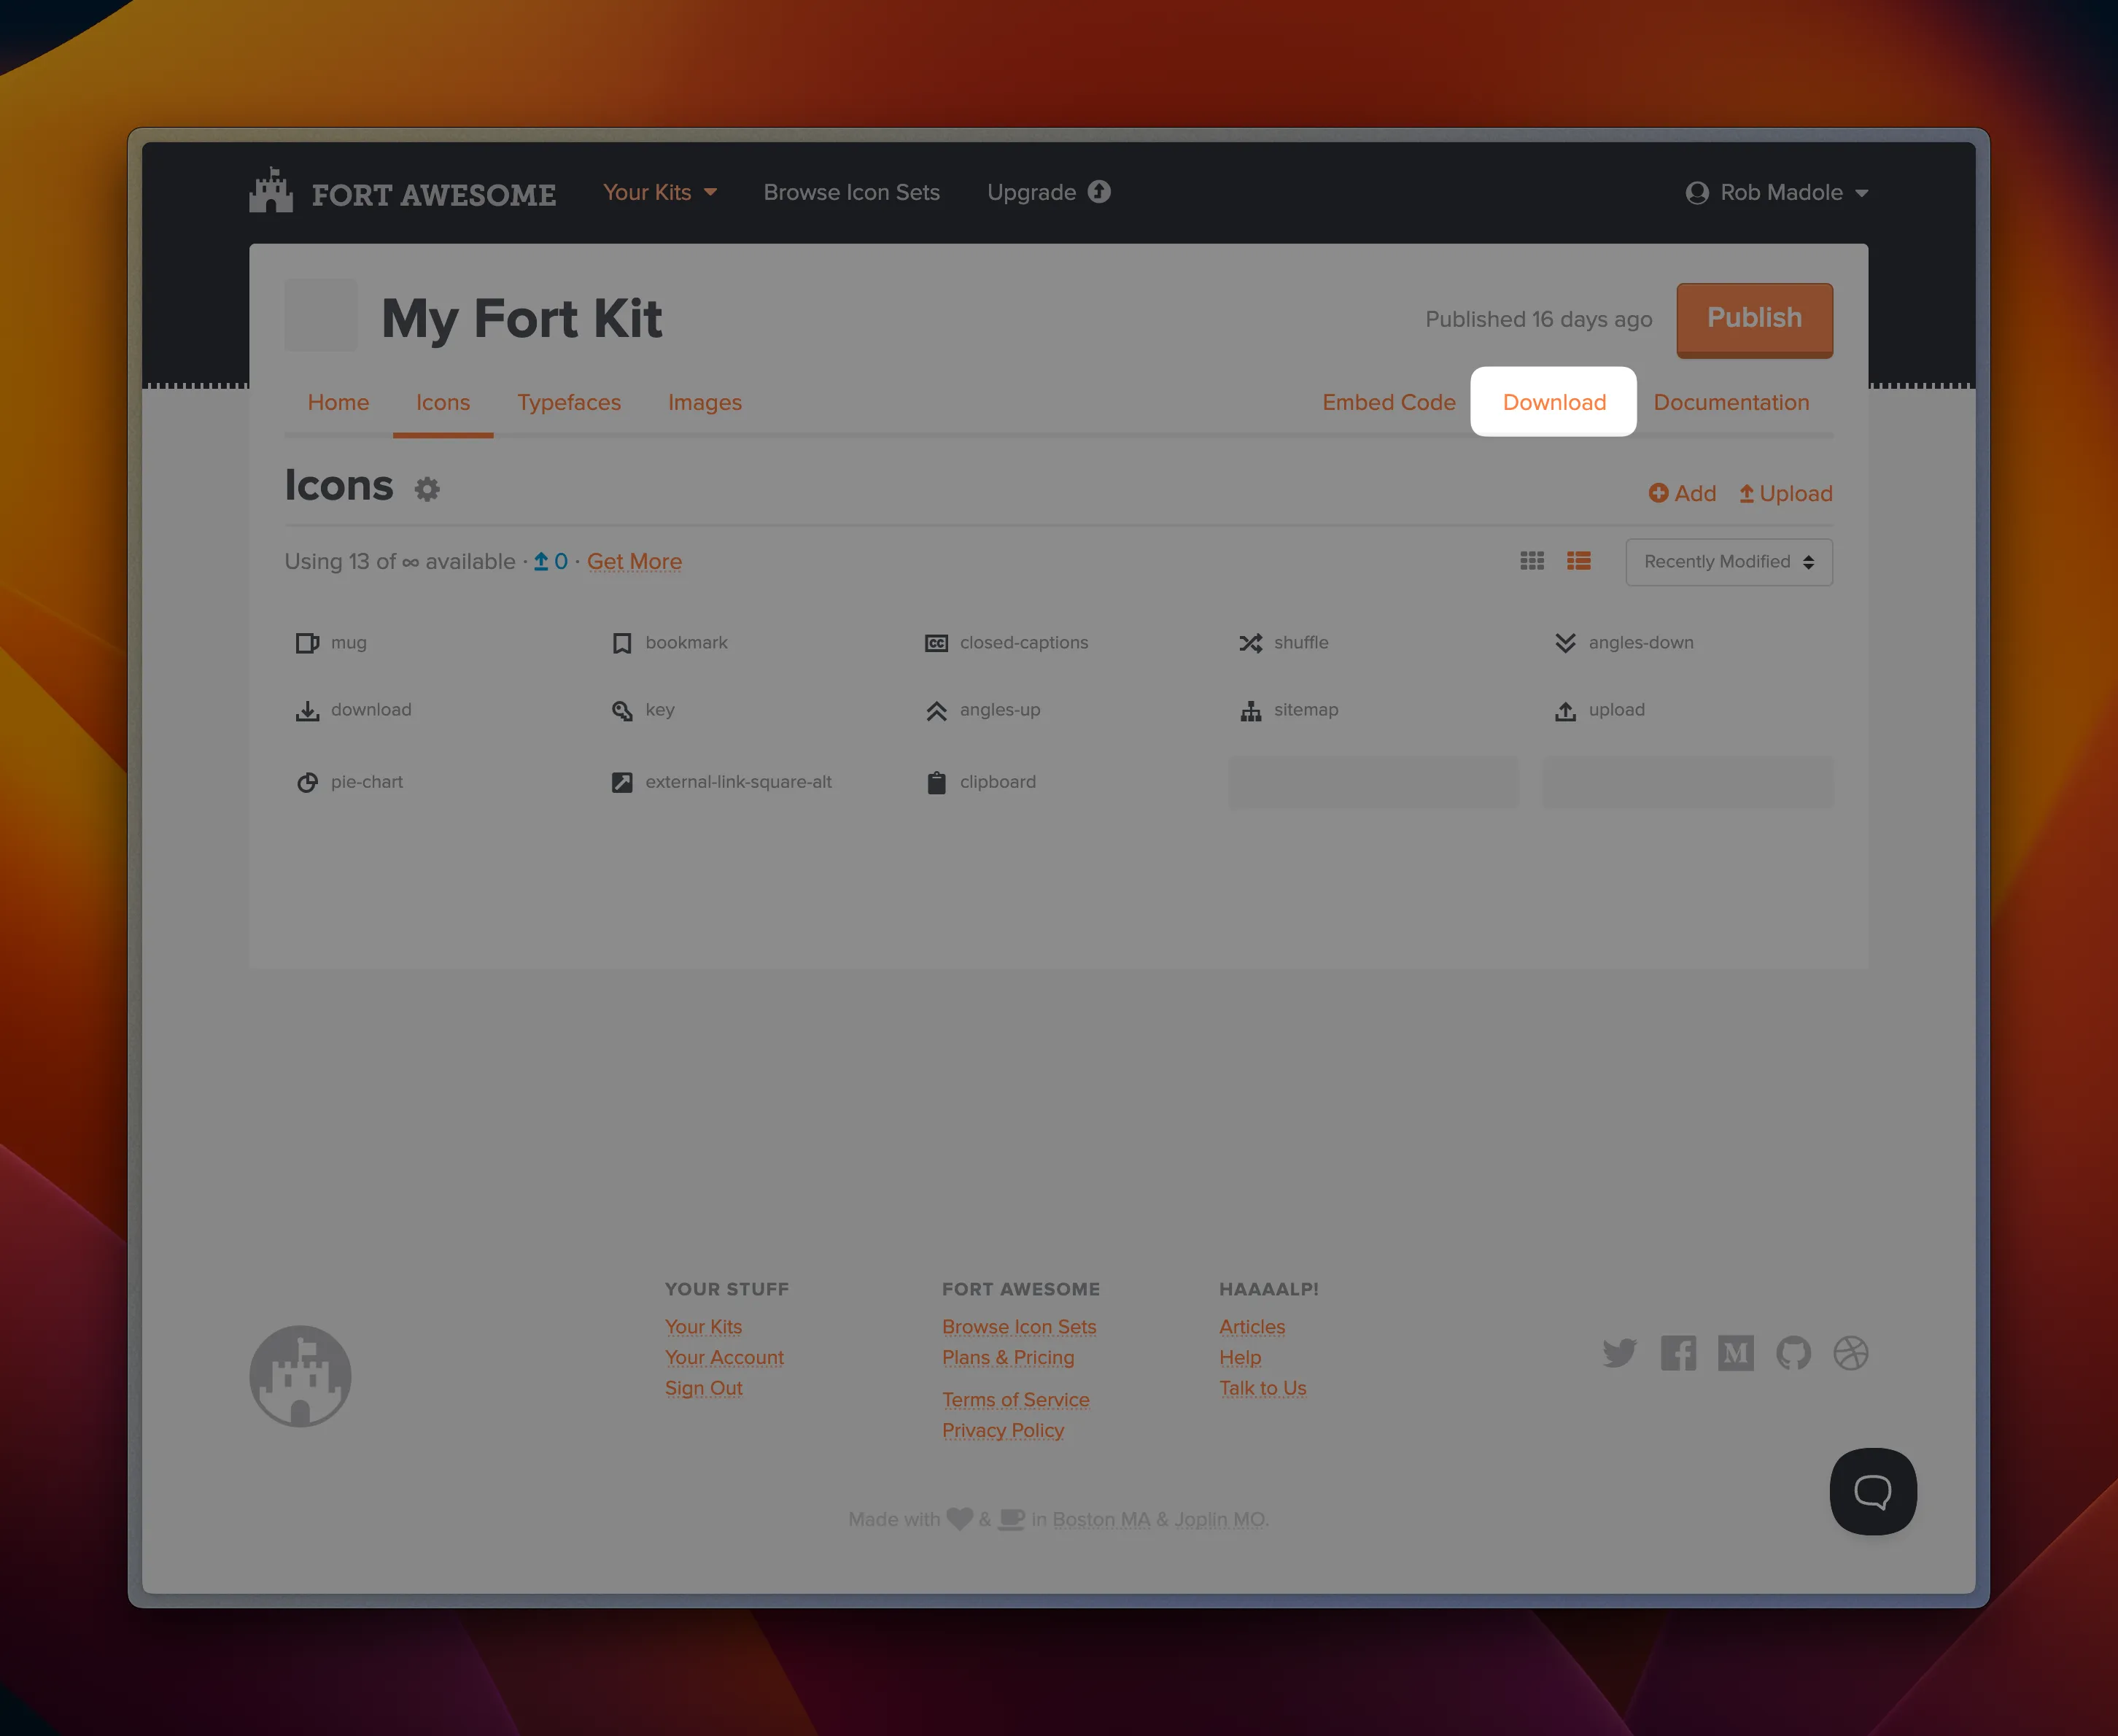
- Login to your fortawesome.com account
- Select the Fort Kit you want to transfer
- Click the Download button and save the file to your desktop
Setting up your new Font Awesome Kit
Section titled “Setting up your new Font Awesome Kit”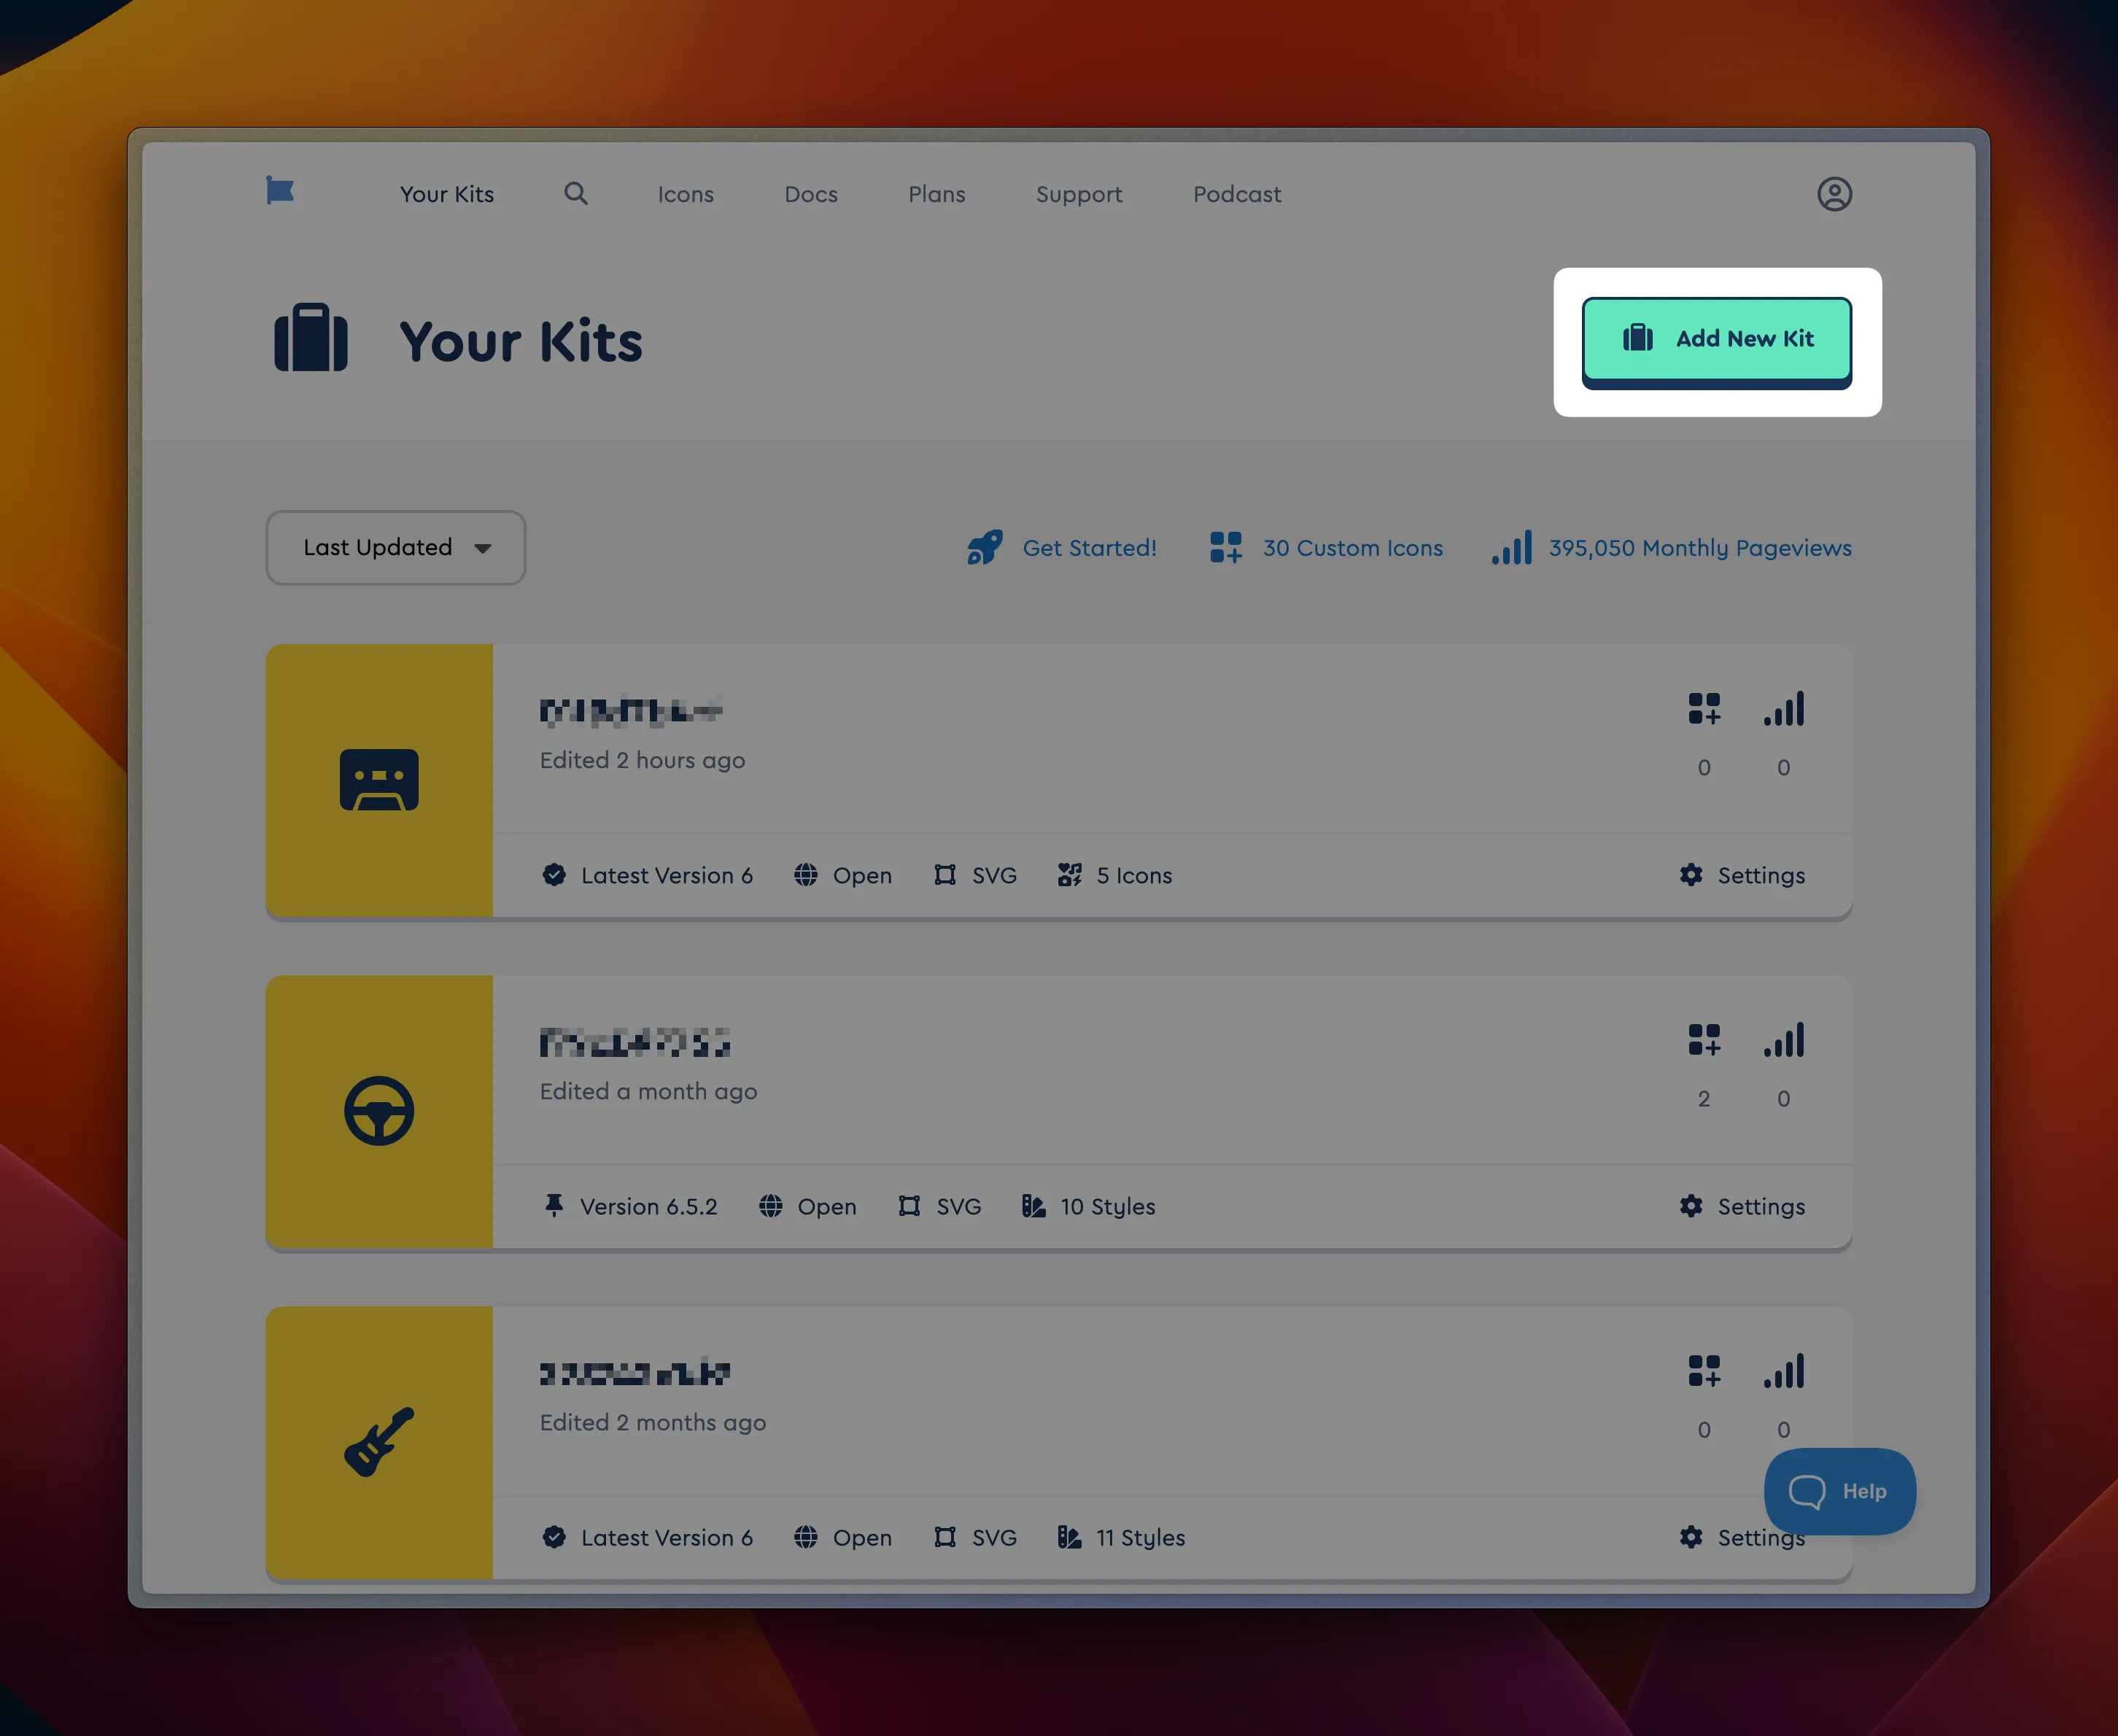
- Login to fontawesome.com
- Visit Your Kits
- Click Add New Kit
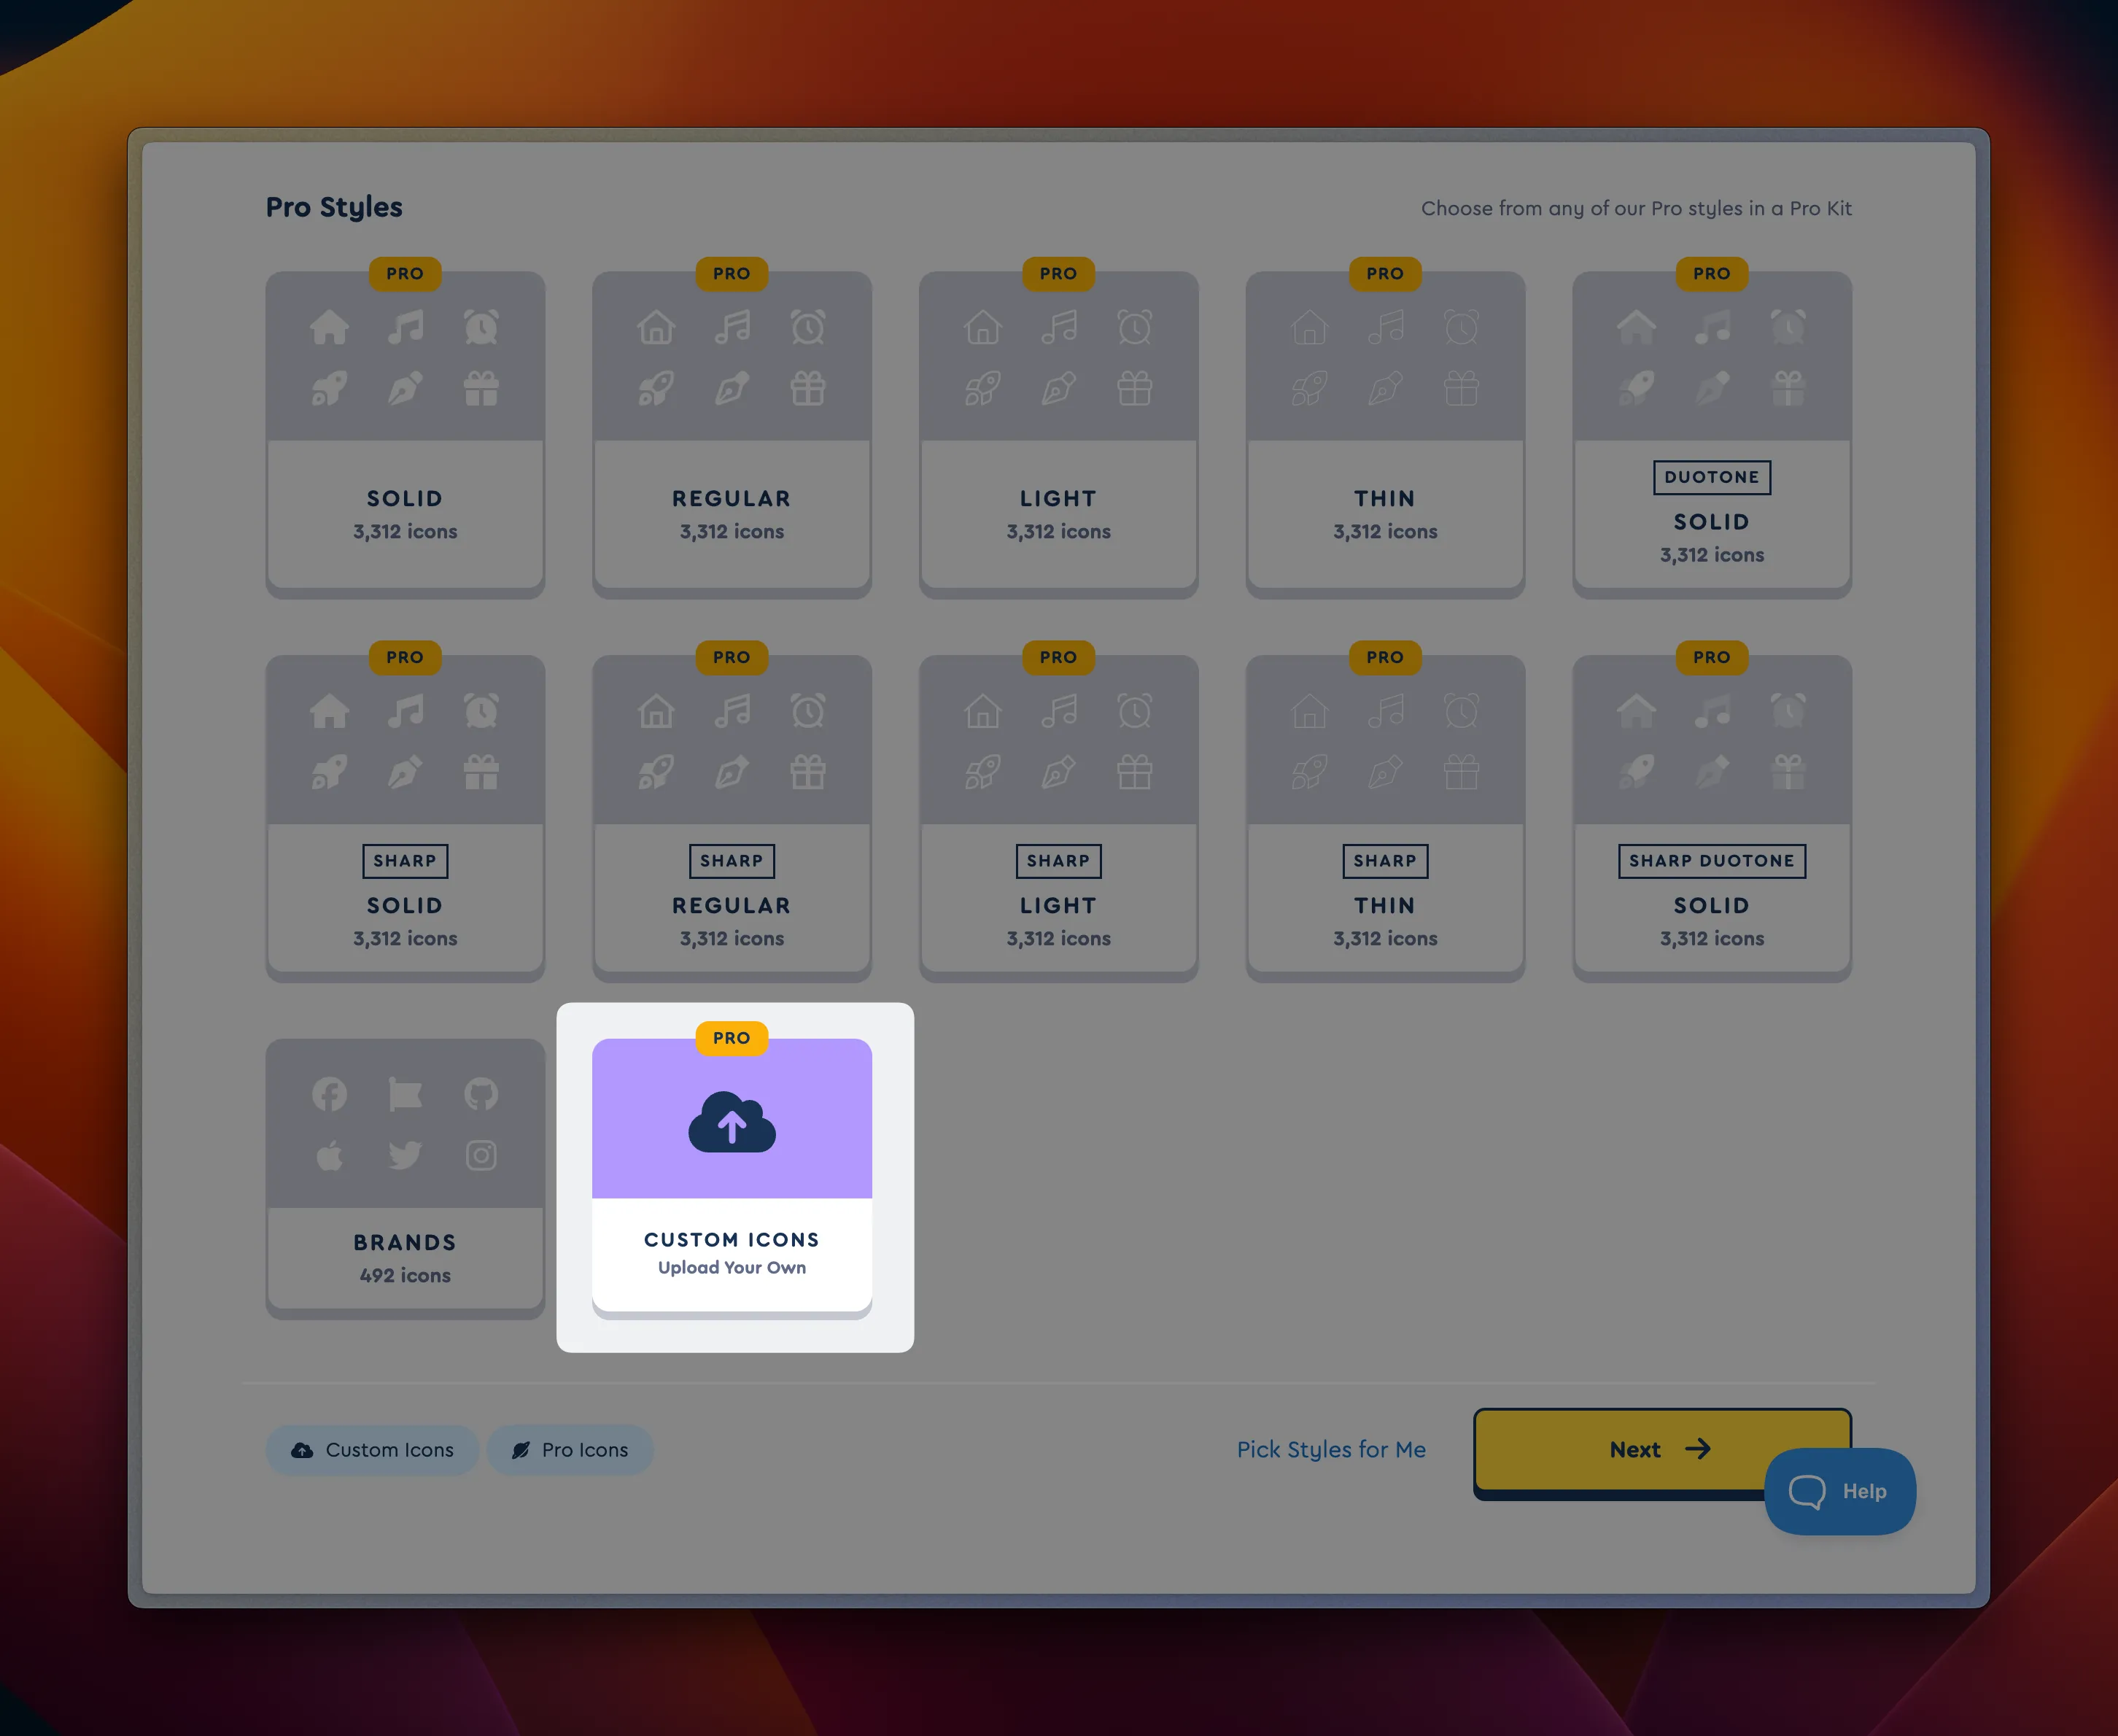
- Select Custom Icons
- Click Next

- Choose Hosted by Us.
You’ll be able to change your Kit settings later if you wish, this is just a place to start to get things going.
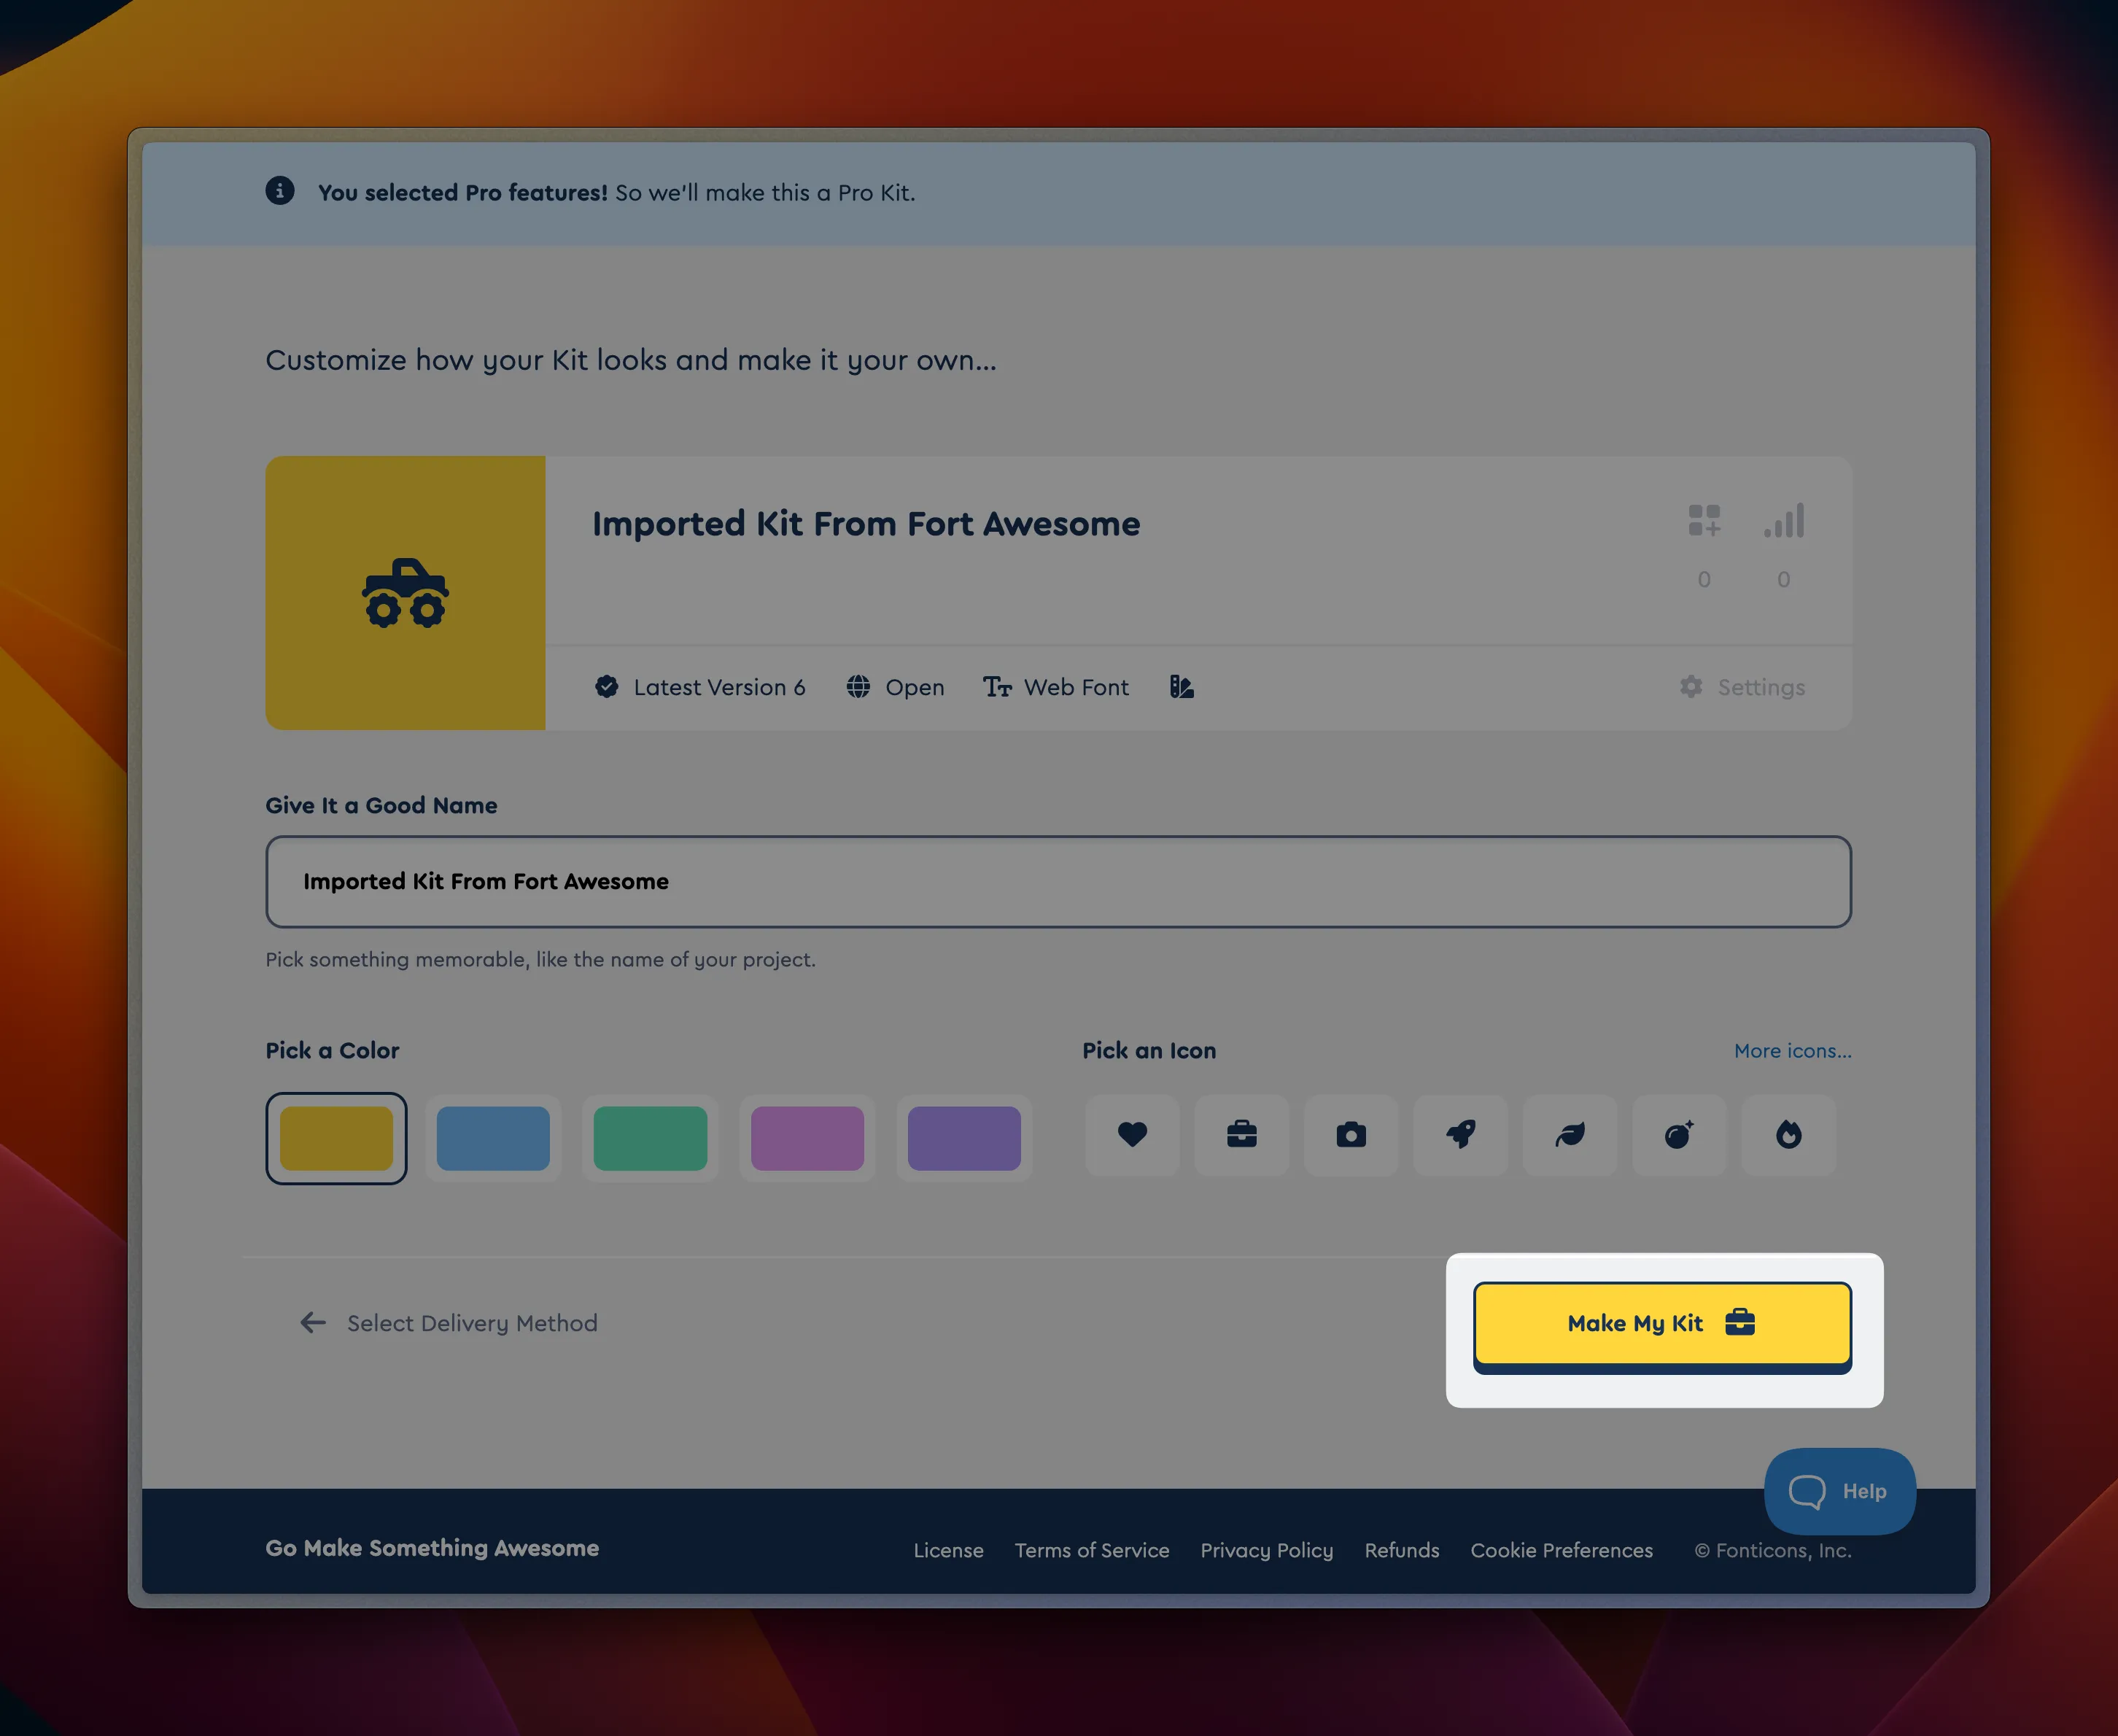
- Give your Kit a name if you wish. It’s a good idea to have this name match the name in Fort Awesome.
- Click Make My Kit
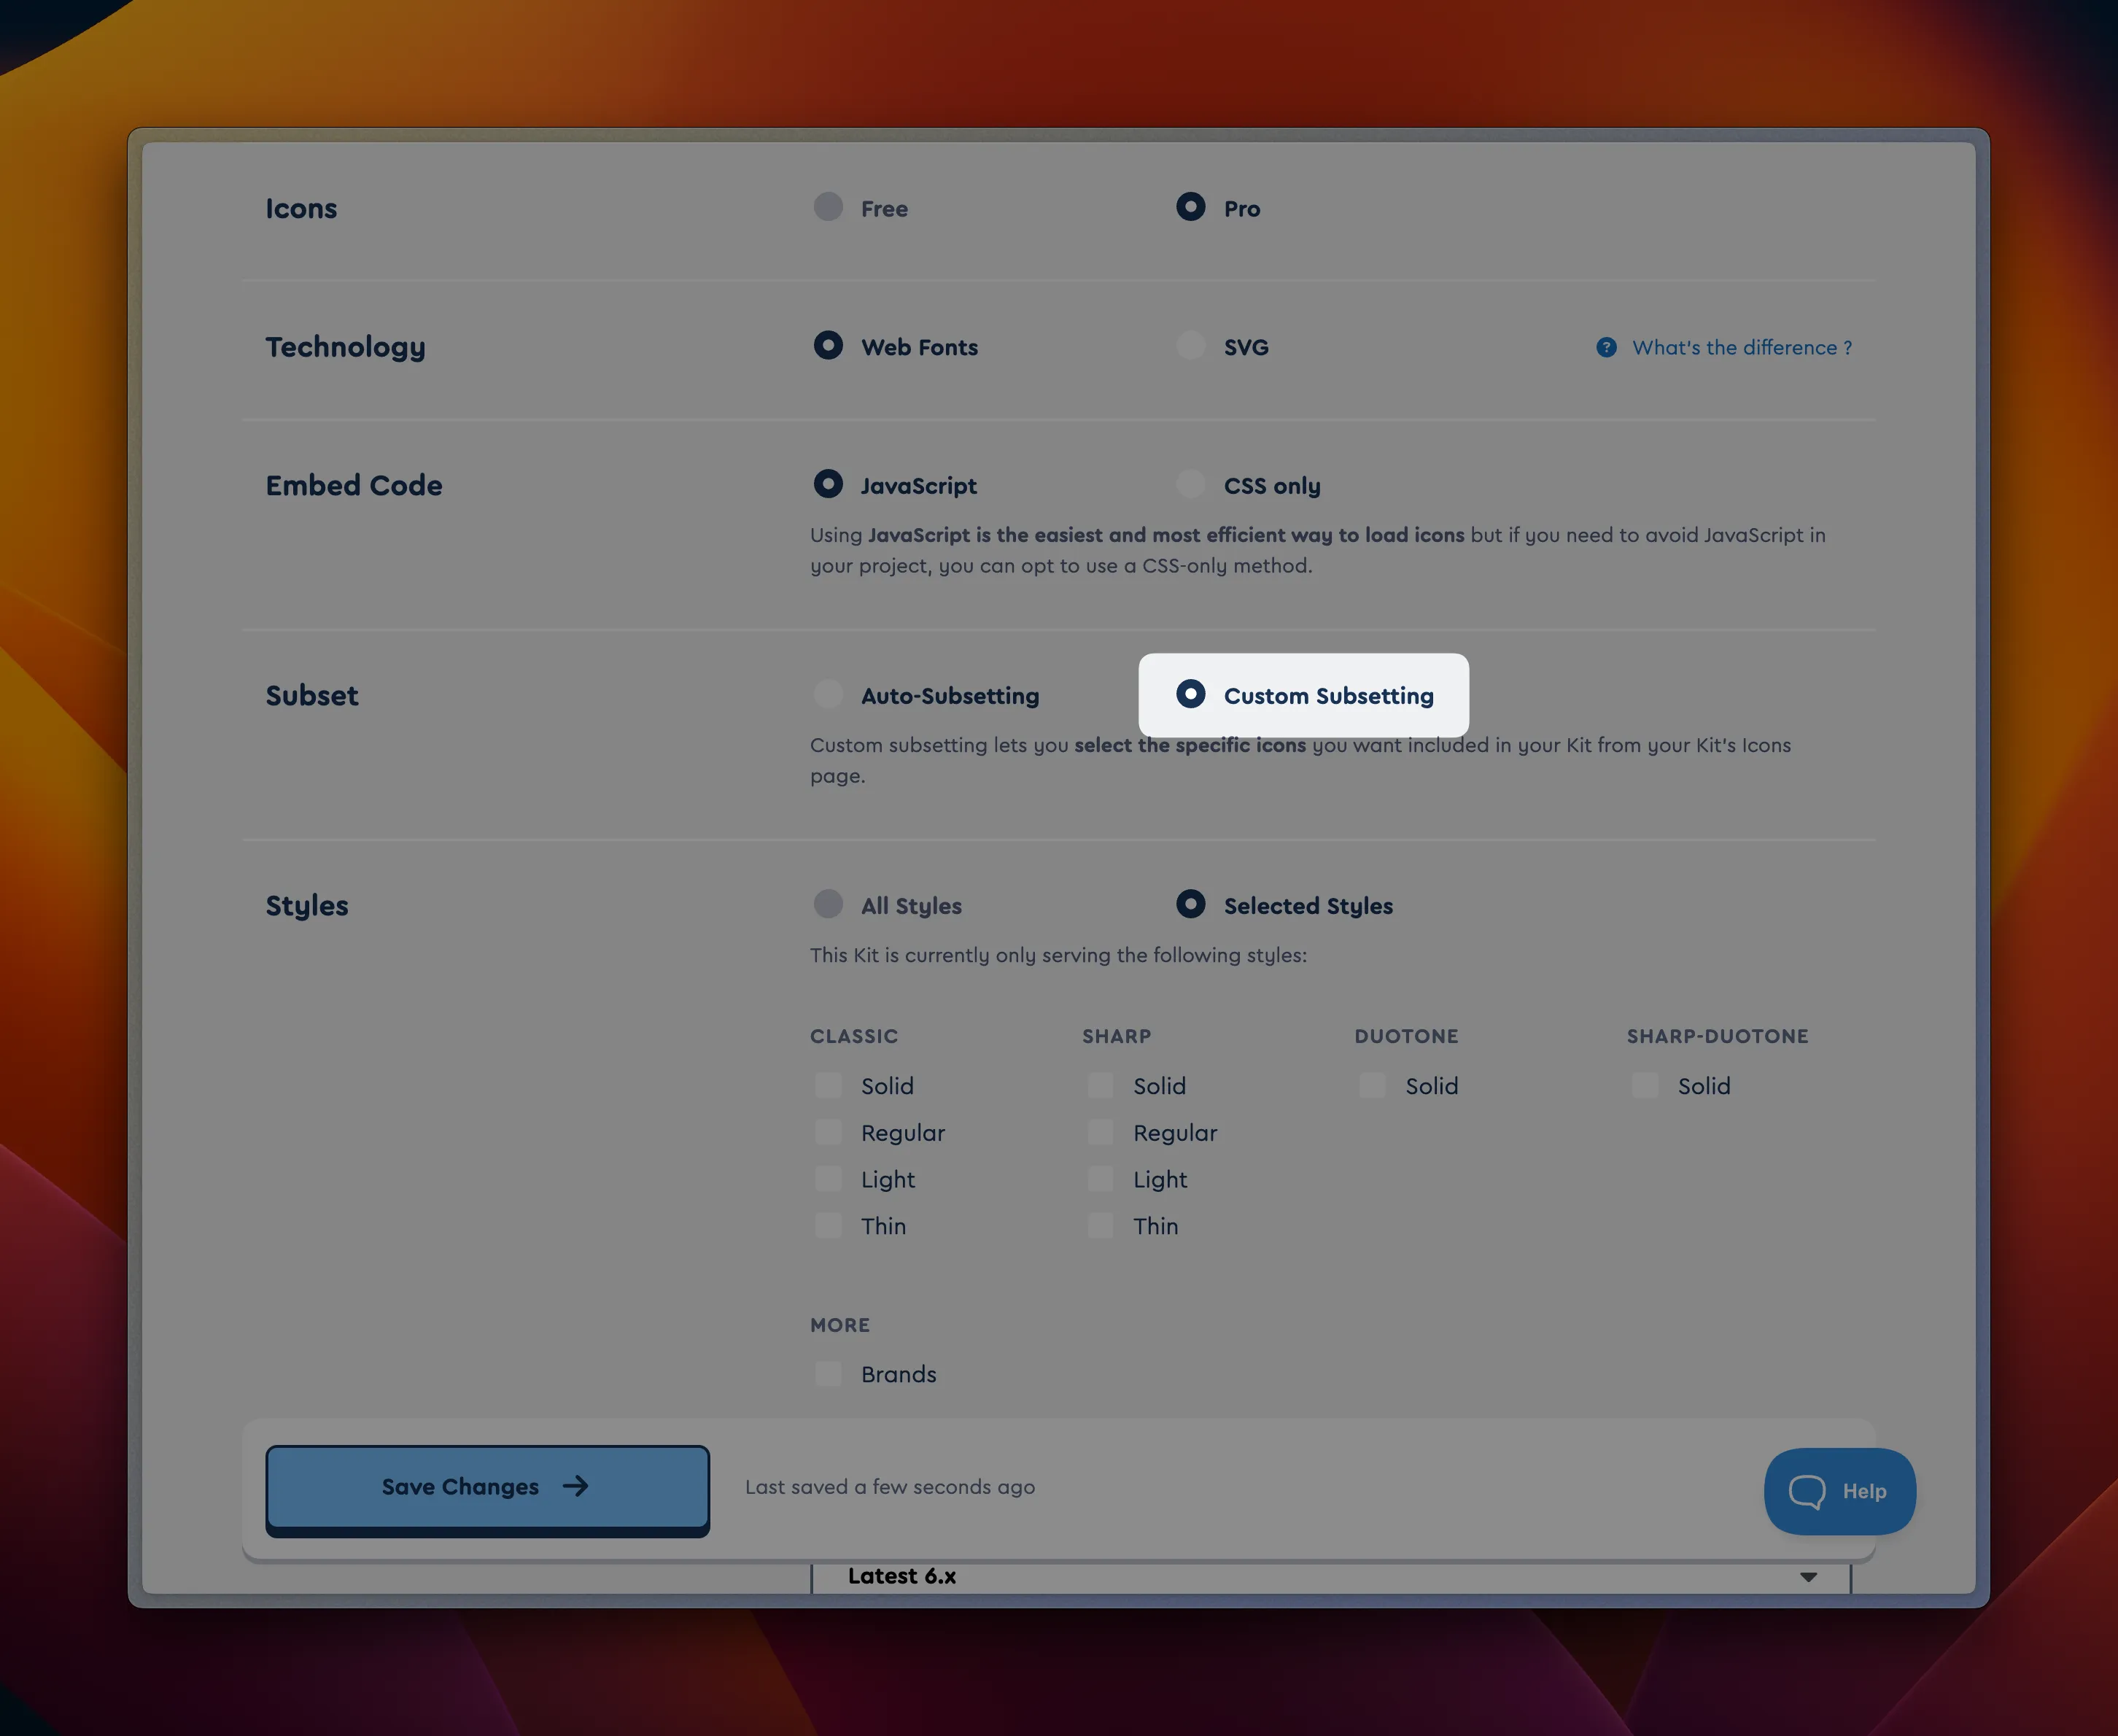
- Now that your Kit has been created, go the the Settings for the new Kit
- In the Subset section, choose Custom Subsetting. This will effectively empty your Kit out.
- Click Save Changes
Import your icons
Section titled “Import your icons”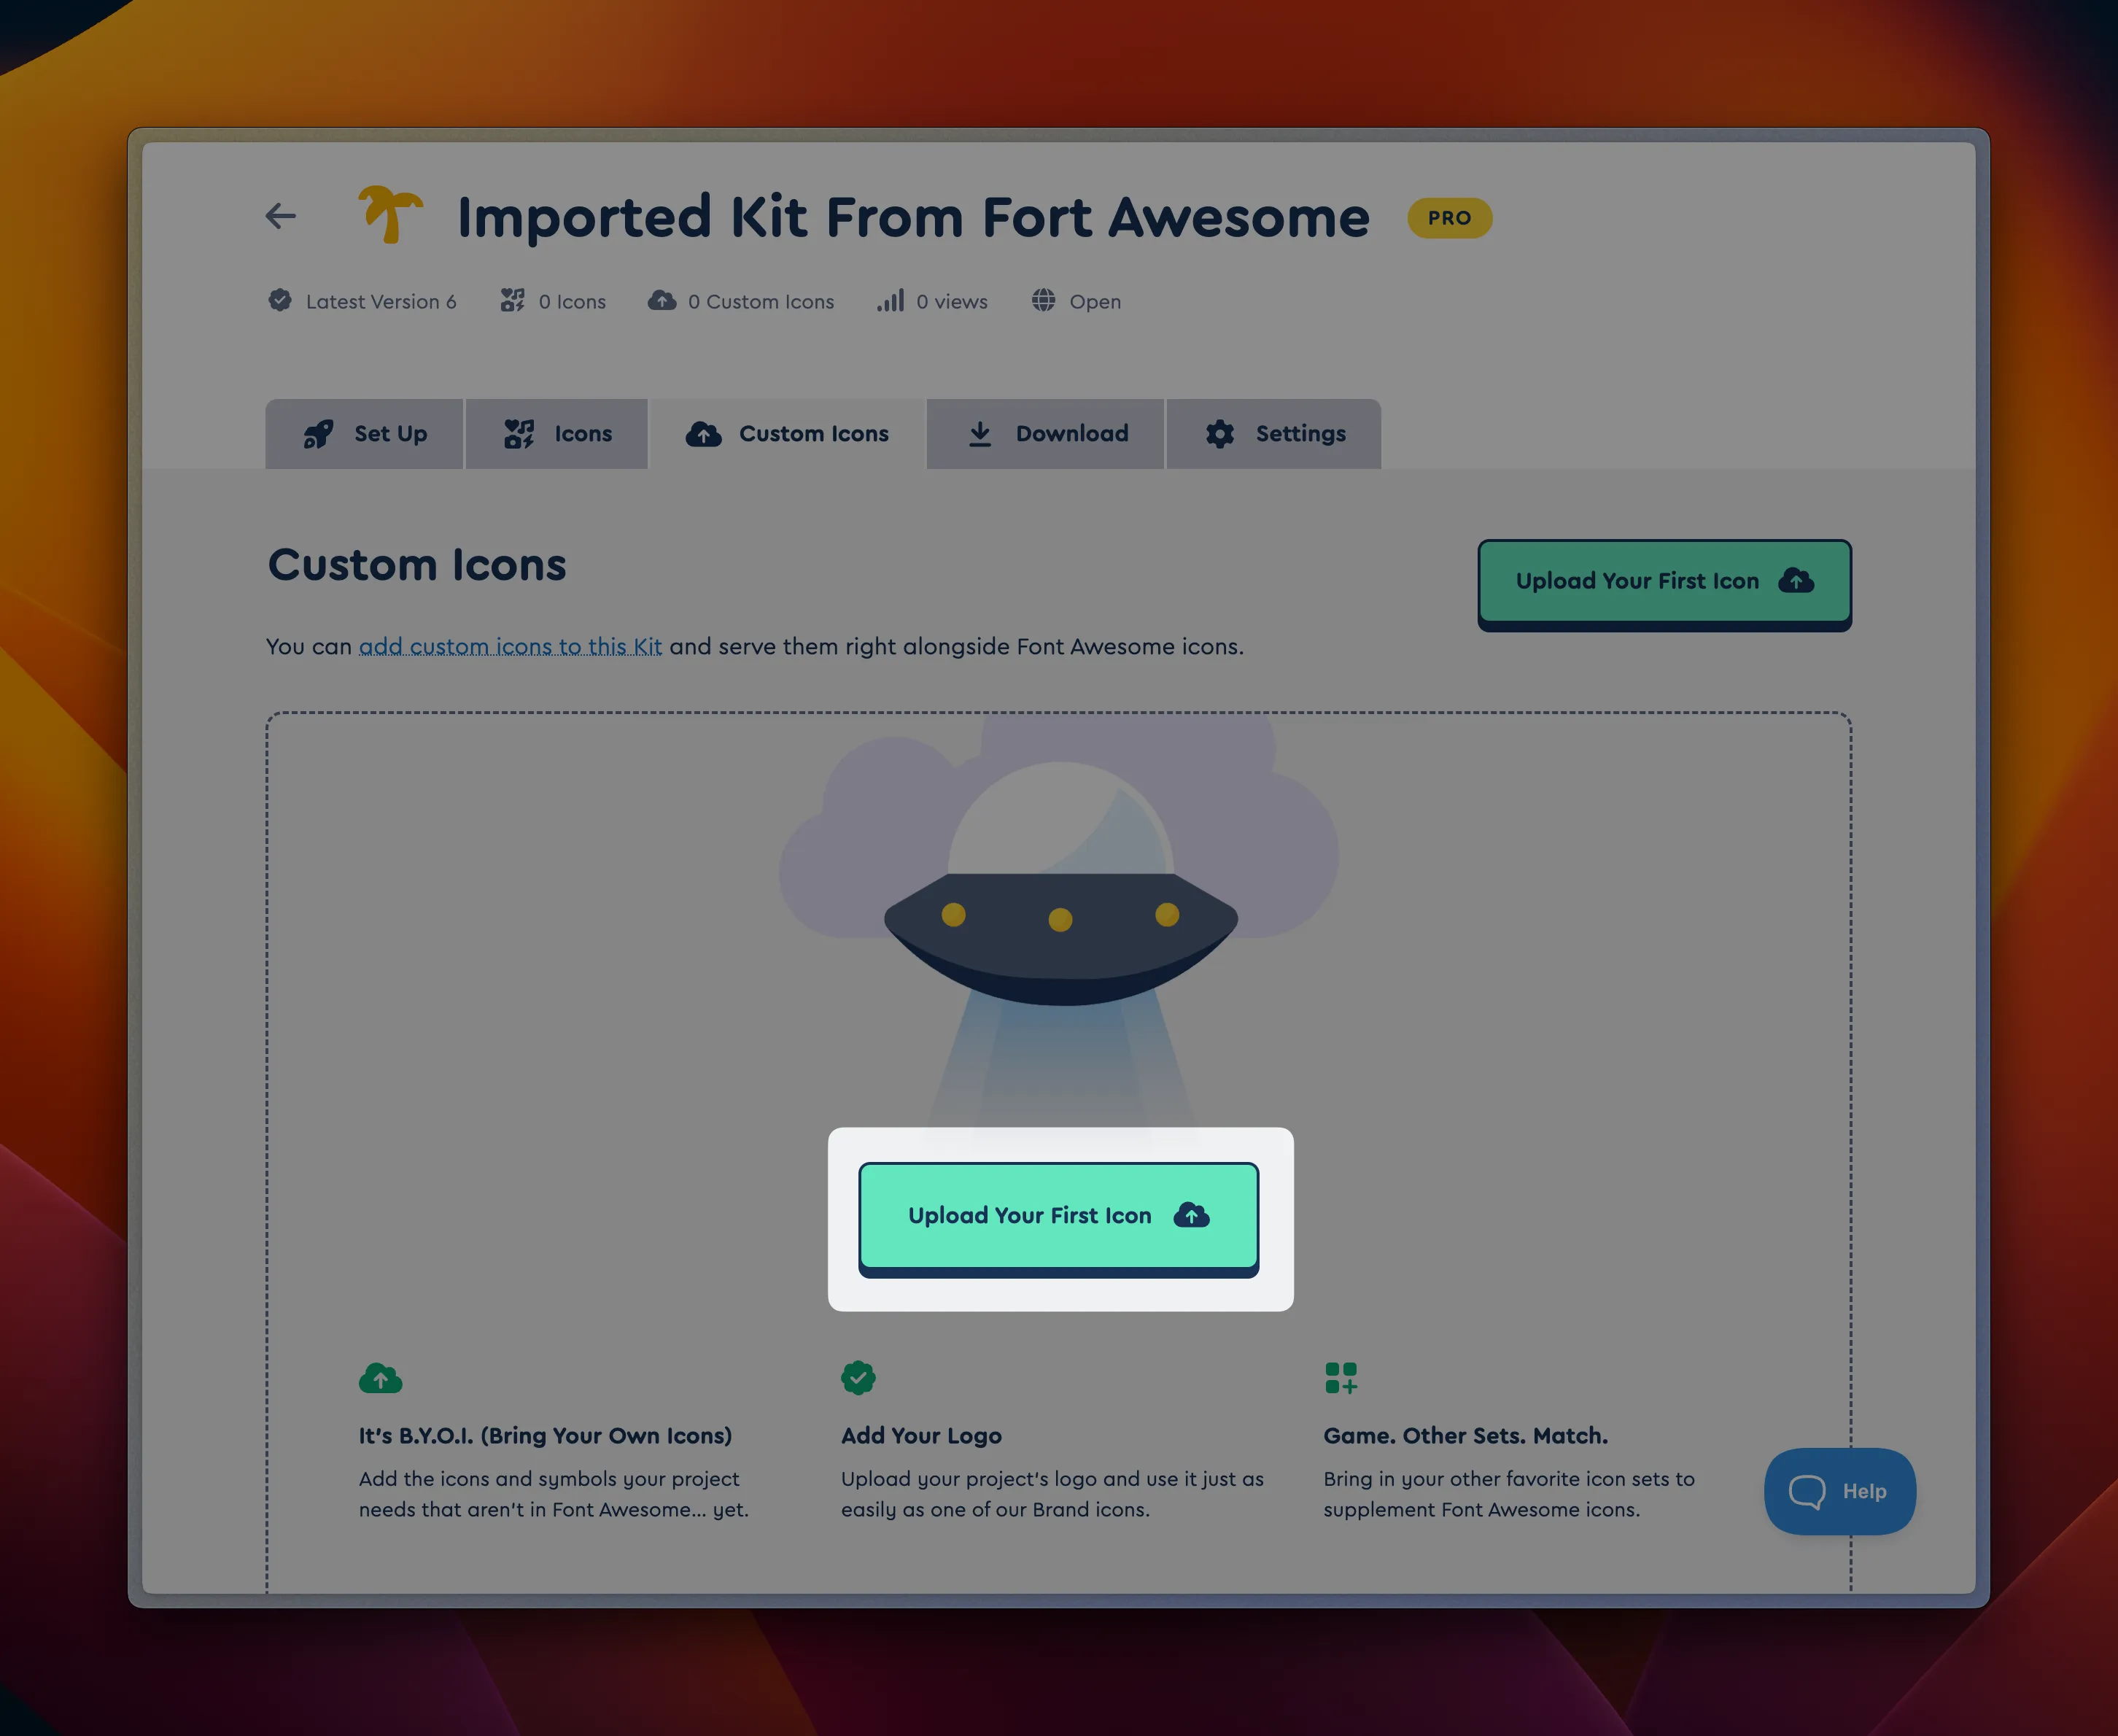
- Click the Custom Icons tab
- Click Upload Your First Icon
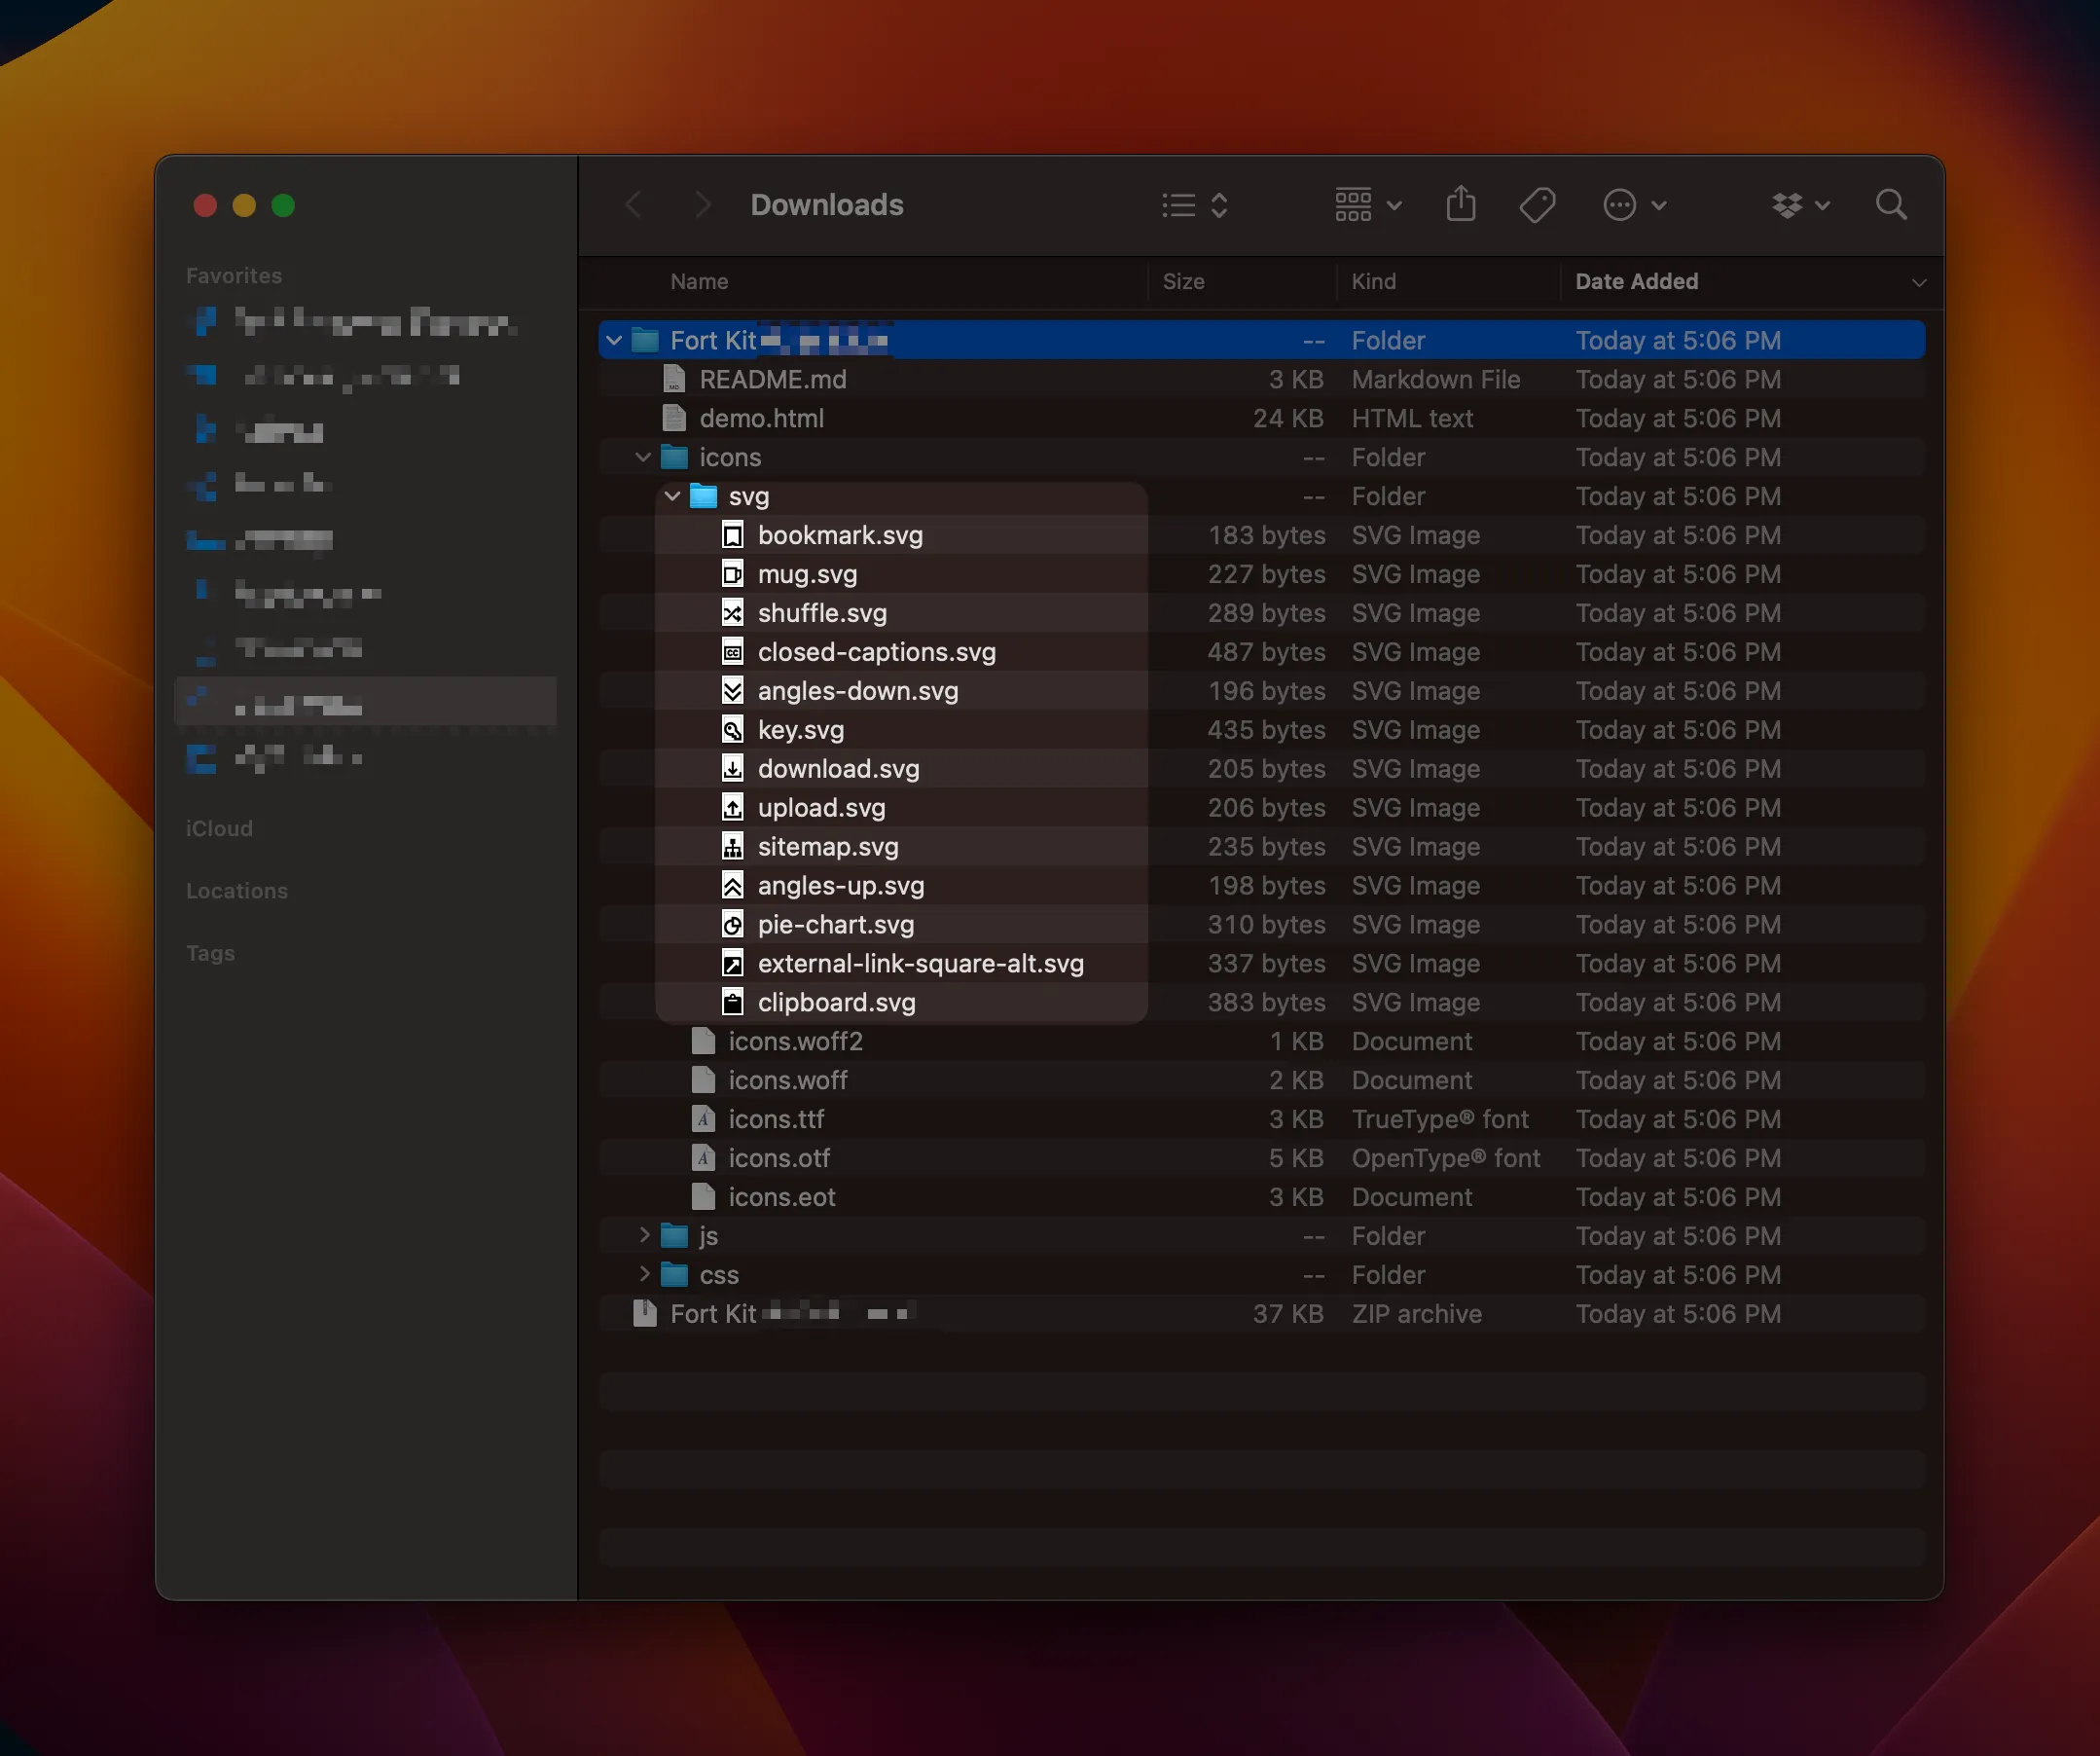
- Locate the files that you downloaded from Fort Awesome

- Browse or drag the files to your Kit’s upload screen
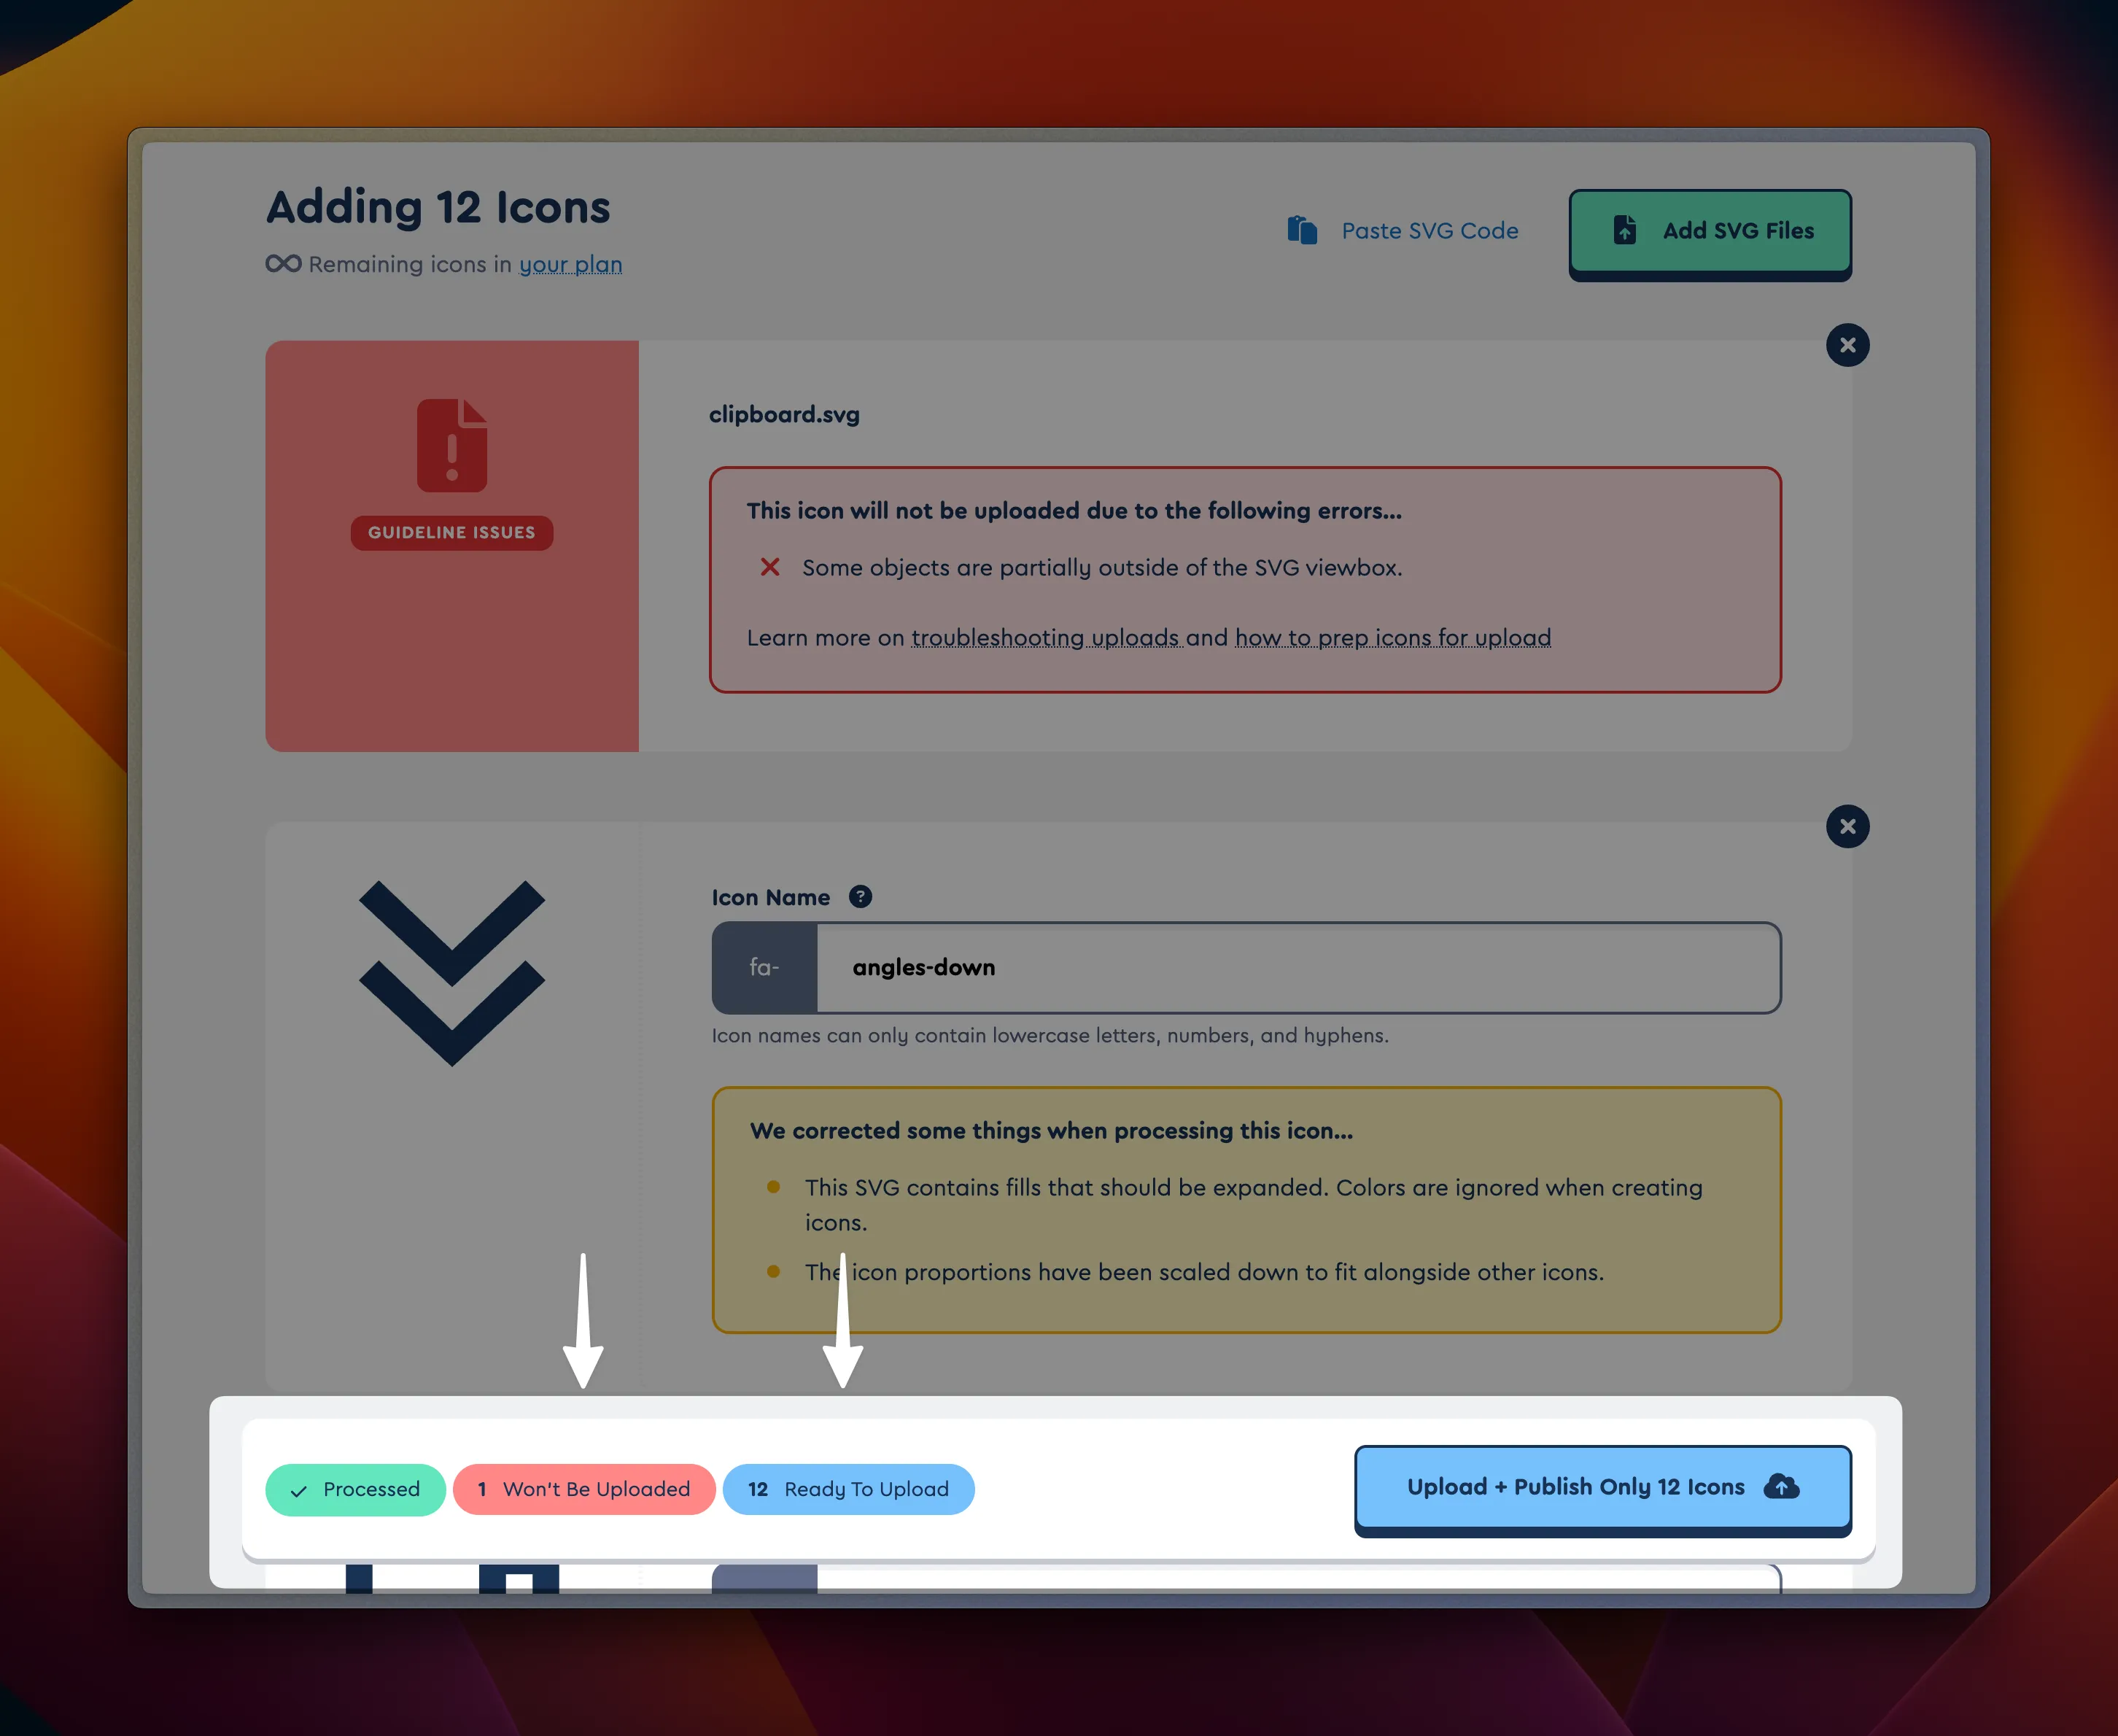
- Keep an eye out for icons that can’t be uploaded. You may need to edit or revise these icons before your Kit import is complete. If you need help email [email protected]
- Click Upload + Publish [Icon count] Icons
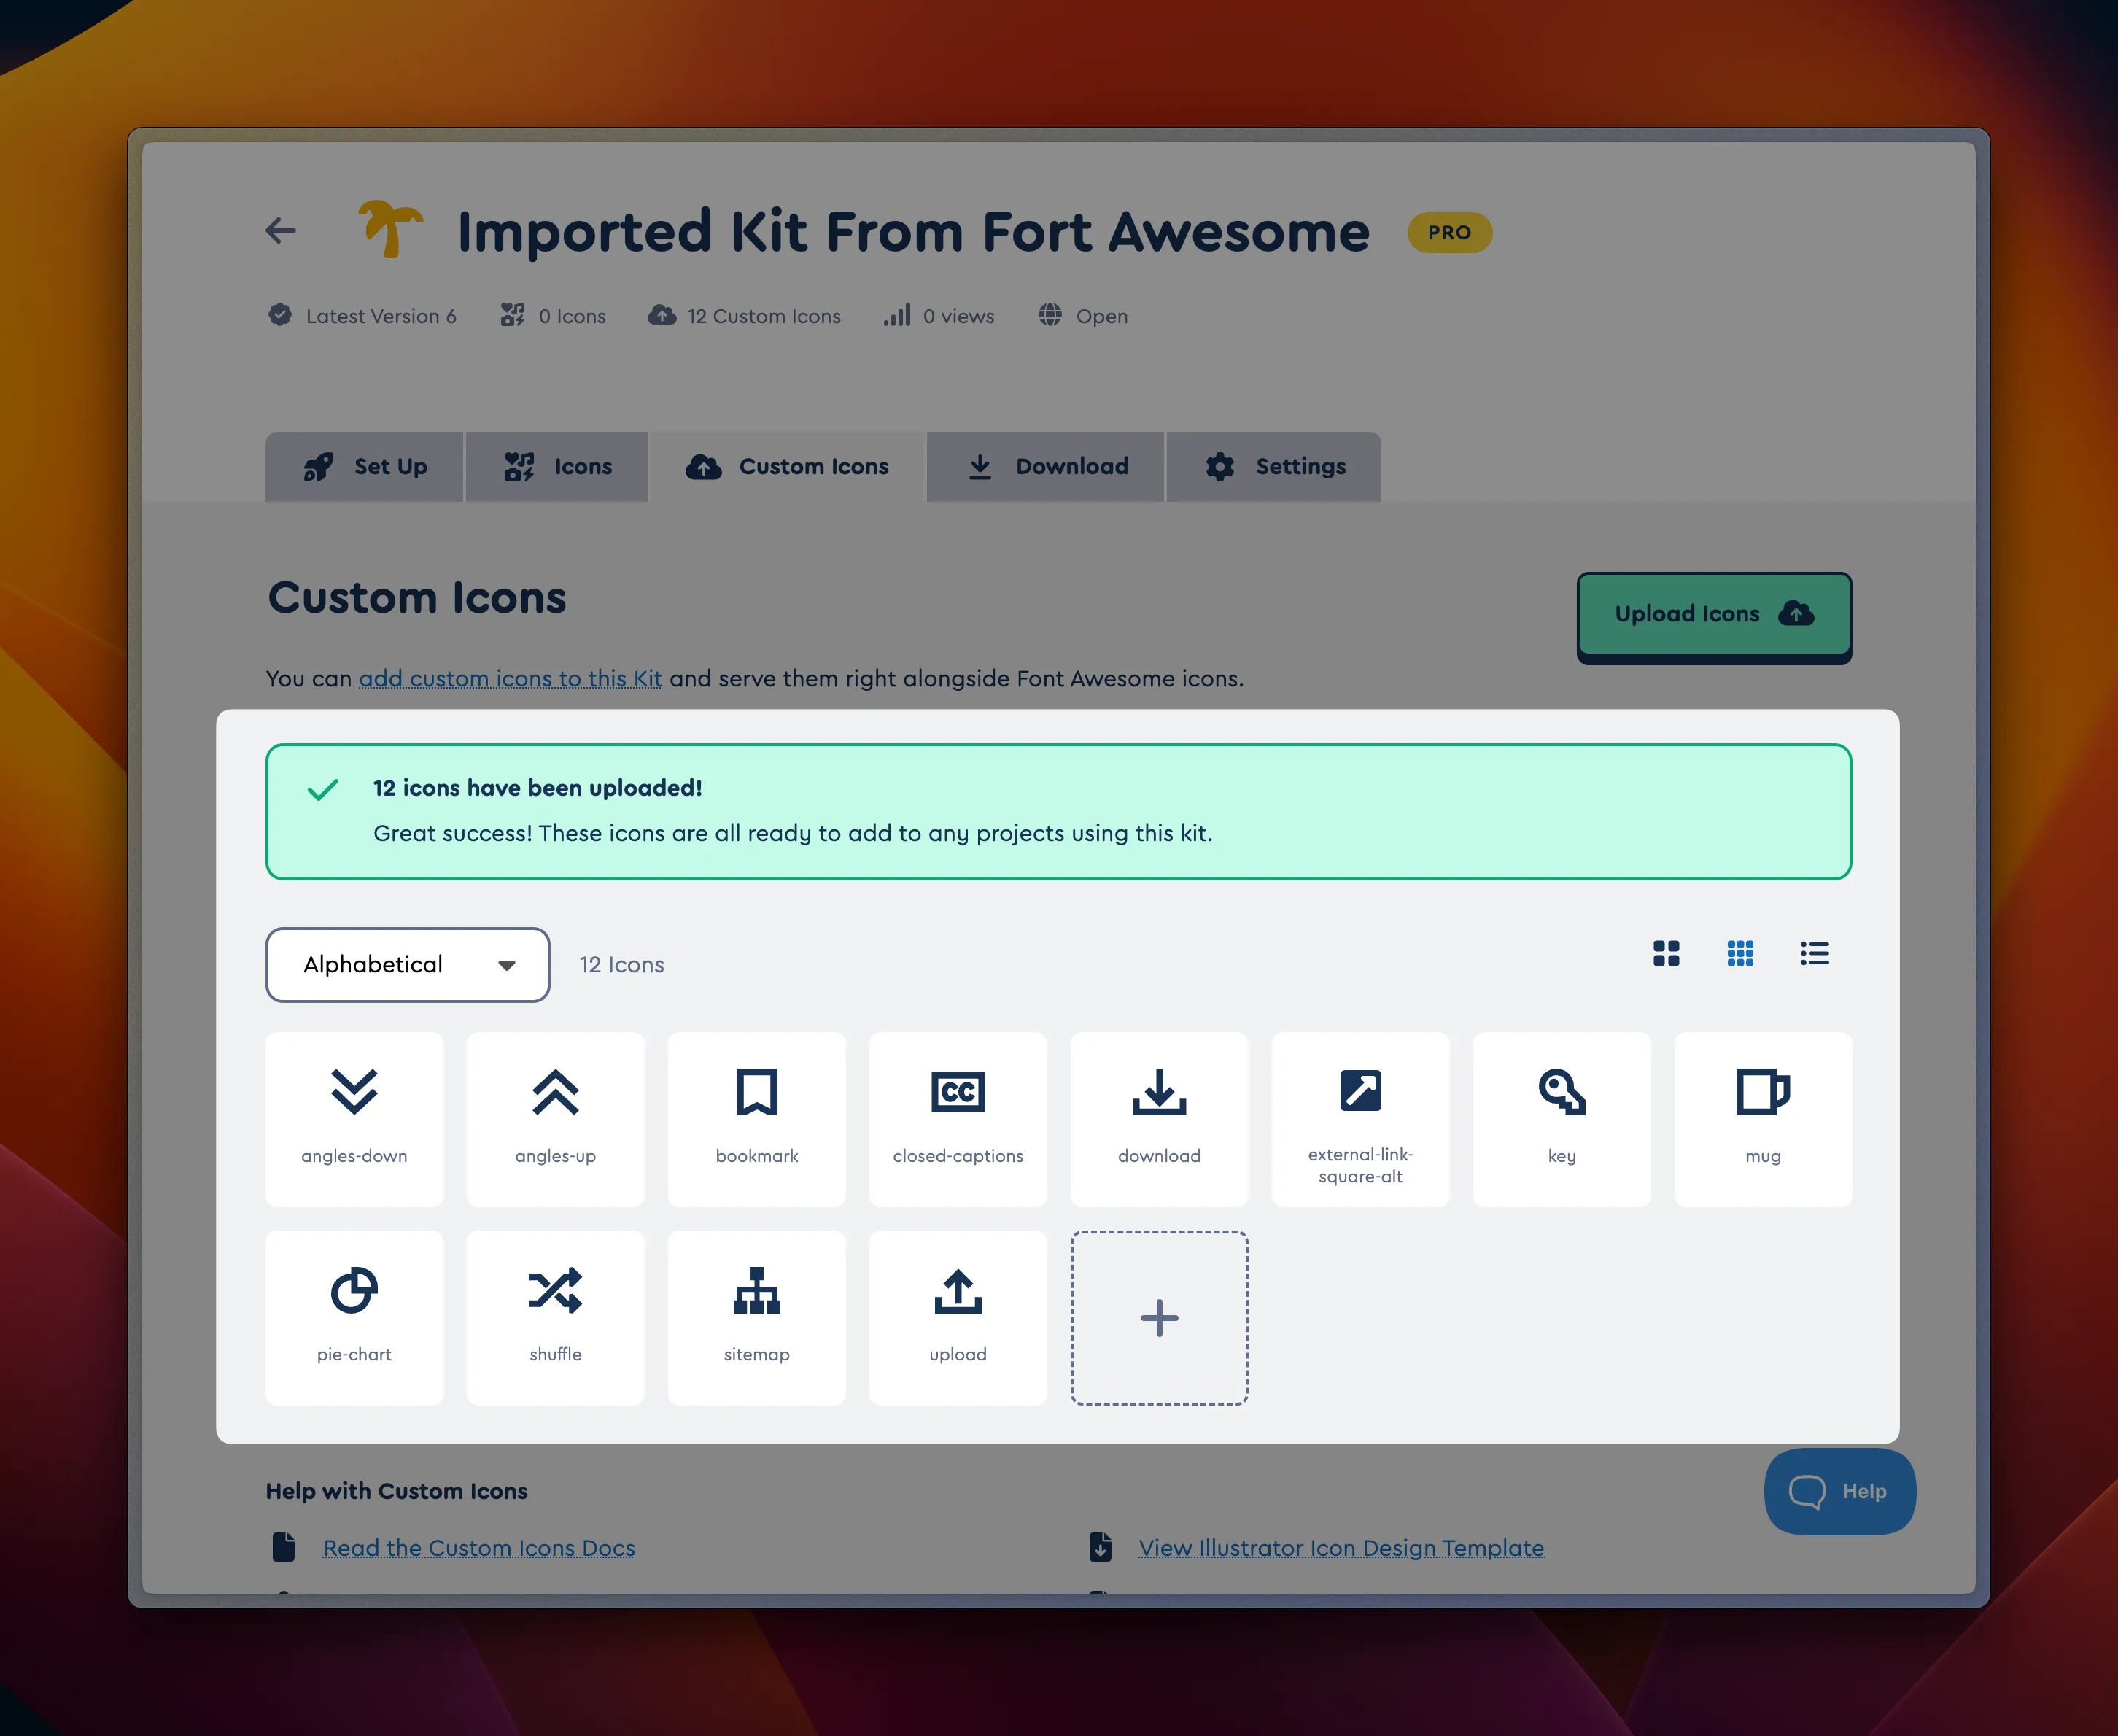
After your icons upload you should be back on your Kits Custom Icons tab
Update your project
Section titled “Update your project”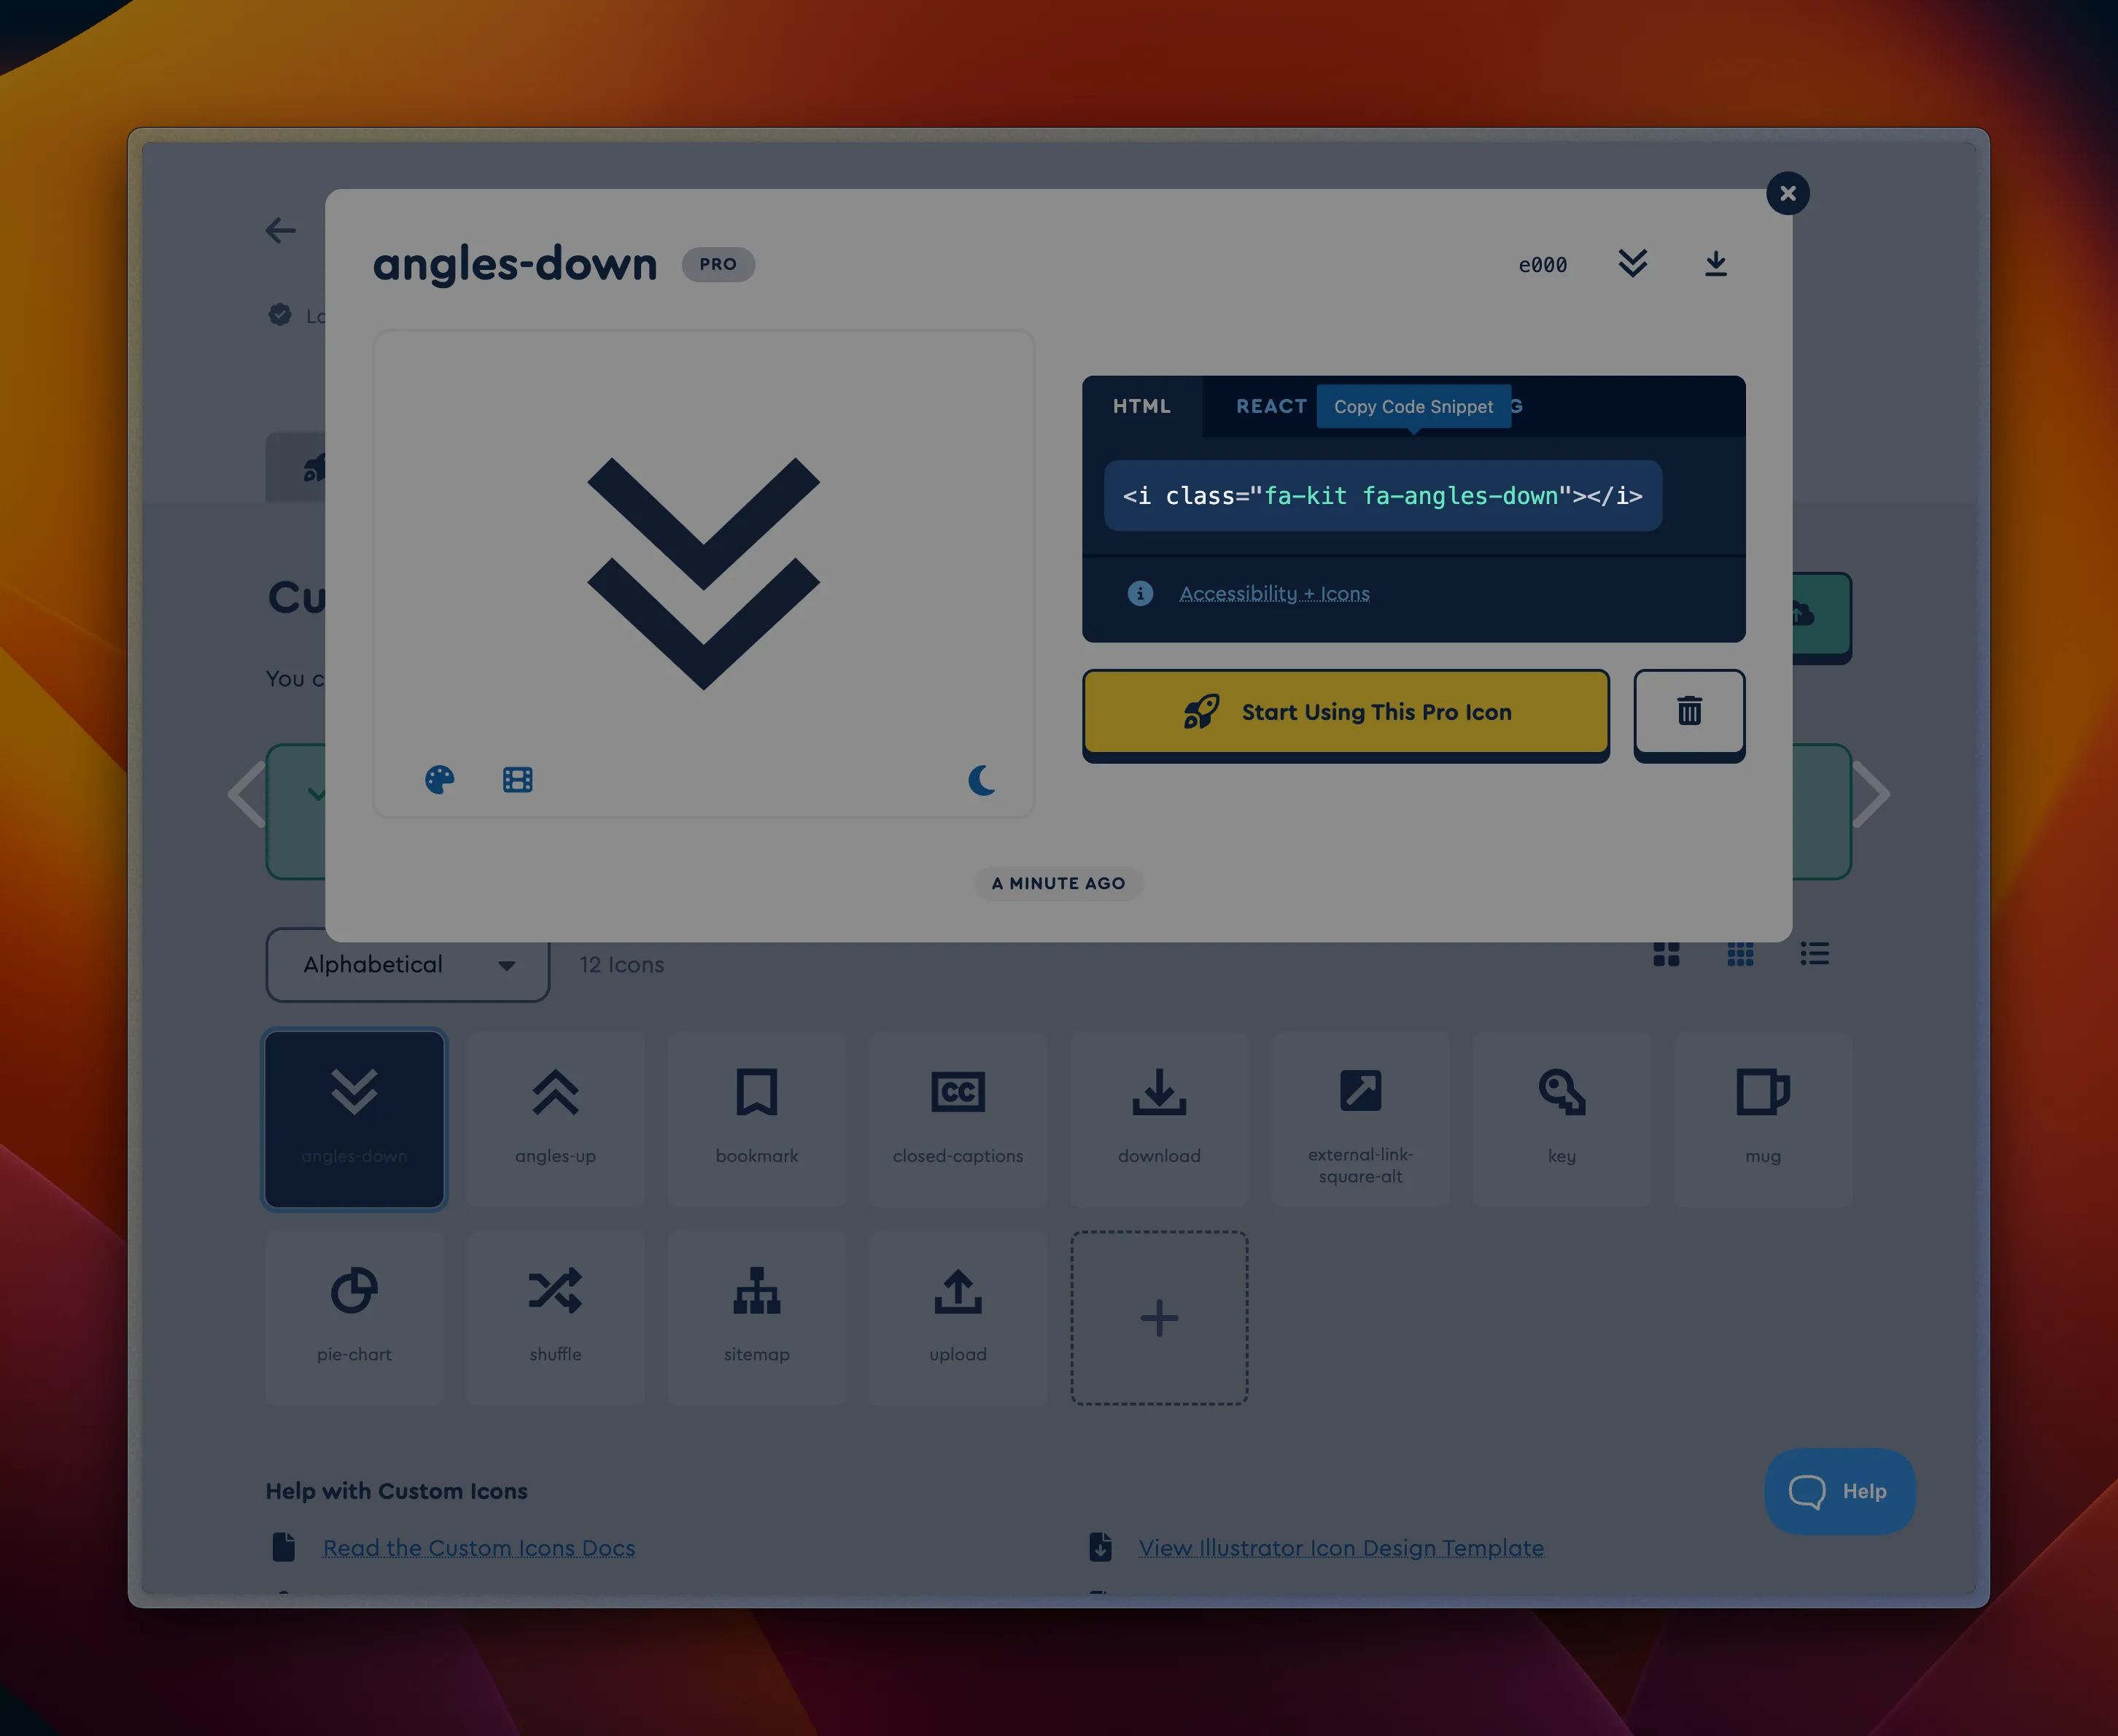
Now that you’ve imported your icons you’ll most likely need to update your project to use the new syntax. A Font Awesome Kit uses fa-kit and fa-ICON-NAME.
If you have issues with this process or an icon doesn’t work as expected, let us know.